Understanding The Grit: Diamond Grinding Wood Floors Explained
Right then, let’s get stuck into diamond grinding. You might be thinking, ‘Diamonds on my floor? Bit fancy, isn’t it?’ Well, yes and no. It’s not about sparkly gems, but about using the sheer hardness of diamond to sort out those pesky floor issues. Think of it as a super-powered way to smooth things out.
What Exactly Is Diamond Grinding?
Basically, diamond grinding uses discs or pads that have tiny diamond particles bonded to them. These aren’t your typical sandpaper grits. We’re talking about industrial-strength stuff here. The machine spins these abrasive heads over the wooden floor. It’s a bit like a very aggressive, very precise sanding process, but instead of paper, you’ve got these super-hard diamond bits doing the work. It’s designed to take off a thin layer of the floor’s surface, and it can handle some pretty tough jobs.
How Diamond Grinding Tackles Unevenness
This is where diamond grinding really shows its muscle, especially when you’ve got a floor that’s seen better days. If you’ve got high spots, old glue residue that just won’t budge, or even minor lipping between boards, diamond grinding can sort it. It works by literally shaving off the high bits until everything is on the same level. It’s not just about making it look nice; it’s about creating a genuinely flat base. It’s particularly good for:
- Removing stubborn old finishes or coatings.
- Flattening out minor undulations or humps in the wood.
- Dealing with dried-on adhesives or screed remnants.
The Science Behind Diamond Abrasives
So, why diamonds? It all comes down to hardness. Diamond is the hardest natural substance known. When you embed these tiny, super-hard particles onto a backing, you create an abrasive that can cut through wood and other materials much more effectively than traditional abrasives like grit or aluminium oxide. The way these particles are arranged and the size of the grit (though it’s not ‘grit’ in the sandpaper sense) determine how aggressive the grinding action is. Different diamond pads are used for different tasks, from heavy stock removal to finer surface preparation. It’s a controlled, powerful way to level the playing field, quite literally.
The Humble Belt Sander: A Traditional Approach
How Belt Sanders Work Their Magic
Right then, let’s talk about the belt sander. It’s the old reliable, isn’t it? You’ve probably seen one, maybe even had a go. It’s basically a powerful motor spinning a continuous loop of sandpaper. This sandpaper belt runs over two drums, and when you push the sander along the floor, that moving belt is what does the actual sanding. It’s a pretty straightforward idea, really. The grit of the sandpaper you choose makes a big difference, of course. You start with a coarser grit to take off the high bits and then move to finer grits to smooth things out.
When Belt Sanding Shines
Belt sanders are brilliant for certain jobs. They’re great for taking off old finishes, like varnish or paint, and they can handle a good amount of wood removal. If you’ve got a floor that’s generally pretty flat but just needs a bit of a refresh, or maybe some minor scuffs, a belt sander can do a decent job. They’re also pretty good at getting into the main areas of a room. Think of it as the workhorse for general floor renovation.
- Taking off old finishes: Varnish, paint, old wax – it’ll get it off.
- General smoothing: Good for making a floor feel less rough.
- Larger areas: Can cover a good amount of ground quickly for basic sanding.
Limitations of Belt Sanding for Levelling
Now, here’s where it gets a bit tricky when we’re talking about levelling really uneven floors. Belt sanders, bless ’em, aren’t always the best for tackling serious dips and bumps. They tend to follow the contours of the floor rather than aggressively flatten them. If you have a really high spot, a belt sander might just skim over the edges, leaving the middle untouched or creating a slight dip itself. It’s like trying to iron a crumpled shirt with a steam roller – it’s a bit too blunt for the fine details of levelling. You can end up chasing your tail trying to get a perfectly flat surface, especially if the unevenness is significant. It takes a lot of skill and patience, and even then, you might not get that perfectly level finish you’re after without a lot of effort.
Tackling Those Annoying Bumps And Dips
Right, let’s get down to the nitty-gritty of dealing with those pesky uneven bits on your hardwood floor. We’ve all seen them – those little high spots that catch your sock, or the dips that make you wonder if you’ve got a secret trampoline installed. Getting rid of them is key to a floor that not only looks good but feels good underfoot.
Diamond Grinding’s Edge on Stubborn High Spots
When you’ve got a particularly stubborn high spot, like a bit of old adhesive that’s hardened like concrete or a nail head that’s decided to pop up, diamond grinding really comes into its own. It’s like having a super-tough file. The diamond bits on the grinding discs are incredibly hard, so they can chew through even the most resilient materials without much fuss. You can target these specific high points with precision. It’s not about taking off huge amounts of wood, but rather carefully shaving down those offending bits until they’re flush with the rest of the floor. Think of it as a very controlled, very powerful sanding process for the really tough stuff.
Belt Sanding’s Battle with Deep Imperfections
Now, a belt sander is brilliant for general levelling, but when you’re up against deep dips or really uneven patches, it can struggle. It works by having a continuous loop of sandpaper that spins. For general wear and tear, it’s great. But if a section of your floor is significantly lower than another, the belt sander might just keep sanding the higher bits down, and the lower bits will remain, well, lower. It can take a lot of passes, and you risk creating a ‘dish’ effect if you’re not careful, where the middle of the floor becomes lower than the edges. It’s not ideal for fixing major dips.
Achieving a Truly Flat Surface
So, how do you get that perfectly flat finish? It often comes down to using the right tool for the job, or sometimes, a combination. For most UK hardwood floors with minor unevenness, a good belt sander followed by a multi-disc or orbital sander can do the trick. However, if you’ve got significant issues:
- Identify the Problem Areas: Walk the floor, feel it with your feet, and mark out the high spots and low dips.
- Target High Spots First: For those really proud bits, diamond grinding is your best bet. It’s efficient and effective at bringing them down to size.
- General Levelling: Once the major offenders are dealt with, you can then use a belt sander for the bulk of the levelling work, followed by finer sanding stages to smooth everything out.
Ultimately, the goal is a floor that feels as smooth as glass, no matter what kind of bumps and dips you started with. It takes patience, but the result is worth it.
Dust Management: A Crucial Consideration
Right, let’s talk about the messy bit. When you’re levelling a hardwood floor, especially in a home, dust is going to be a big factor. It’s not just about making a mess; it’s about your health and the state of your house afterwards.
The Dust Cloud of Belt Sanders
Traditional belt sanders, bless ’em, can kick up a serious amount of dust. When that abrasive belt is grinding away at the wood, it turns it into a fine powder. This powder doesn’t just stay put. It floats around. You’ll see it settling on furniture, curtains, and pretty much everything else. It gets into nooks and crannies you didn’t even know existed. Honestly, it can feel like you’re working in a snowstorm, but with wood dust instead of snow. It’s not great for breathing, either. You really need to seal off rooms and wear a good mask.
Diamond Grinding’s Dust Control Systems
This is where diamond grinding often has a bit of an advantage. Most modern diamond grinding machines are designed with dust extraction built right in. They usually have a port where you can attach a powerful vacuum cleaner. This setup sucks up most of the dust as it’s being created. It’s not perfect, mind you, nothing ever is, but it makes a massive difference. You’ll still get some dust, but it’s a fraction of what a belt sander can produce. It means less cleaning up afterwards and a much healthier environment while you’re working.
Health and Safety First
No matter which method you choose, dust is a concern. Wood dust, especially from older floors, can contain all sorts of things. It’s not just wood particles; it could be old finishes, treatments, or even traces of things you don’t want to be breathing in. So, a few things to keep in mind:
- Masks are a must: Always wear a good quality dust mask, preferably an FFP2 or FFP3 rated one.
- Ventilation: Even with dust extraction, open windows if you can, but seal off other parts of the house.
- Clean up properly: Don’t just sweep. Use a vacuum with a HEPA filter if possible. Damp cloths are also good for wiping down surfaces.
- Consider the age of the floor: If your floor is very old, it might have had treatments like lead paint or asbestos in its finish. In these cases, professional advice is highly recommended before you start any sanding or grinding.
Speed and Efficiency: Getting The Job Done
Right then, let’s talk about time. Because nobody wants their house turned into a building site for weeks on end, do they? When you’re looking at levelling a hardwood floor, speed and how much effort it takes are pretty big factors. You want it done, and you want it done well, without living in a dust cloud for ages.
How Quickly Can Diamond Grinding Level Floors?
Honestly, diamond grinding is pretty nippy when it comes to taking down those high spots. It’s a bit like a really aggressive sander, but instead of sandpaper, you’ve got these tough diamond bits that just chew through the wood. It’s not a gentle process, but it gets the job done fast. For really uneven bits, it’s often quicker than other methods because it removes material so effectively. You can usually get a good chunk of levelling done in a single pass, especially if the machine is set up right. It’s not about a light skim; it’s about making a real difference, and that takes less time than you might think.
The Pace of Belt Sanding Levelling
Now, a belt sander is a different beast. It’s great for general sanding, making things smooth. But when it comes to levelling out serious bumps and dips? It can be a bit of a slog. You’re often going back and forth, trying to get the high bits down without digging too deep into the lower bits. It takes patience. You might need to use coarser grits to start, which means more passes, and then finer grits to smooth it all out. It’s a more gradual process, and if the floor is really out of whack, it can take a good while. You’re essentially working with the grain, trying to coax it into being flat, rather than aggressively removing material.
Time vs. Quality
So, where does that leave us? If you’ve got a floor that’s just a bit wavy, a belt sander might be fine and give you a lovely finish. But if you’ve got those annoying high spots or dips that are really noticeable, diamond grinding is usually the faster route to a flat surface. It’s more about brute force, but it gets you to that level base quicker. You might spend a bit more time on the initial levelling with diamond grinding, but then you can move on to the finer sanding stages. With a belt sander, the levelling itself can take a long time, and then you still have all the other sanding to do. It really comes down to how bad the unevenness is and how quickly you need it sorted. Sometimes, spending a bit more time upfront with the right tool saves you time overall.
The Finish: What To Expect From Each Method
Right then, let’s talk about the end result. After all that hard graft, what kind of floor are you actually left with? It’s not just about getting it flat, is it? The look and feel matter too, especially if you’re planning on sealing or finishing it.
Surface Texture After Diamond Grinding
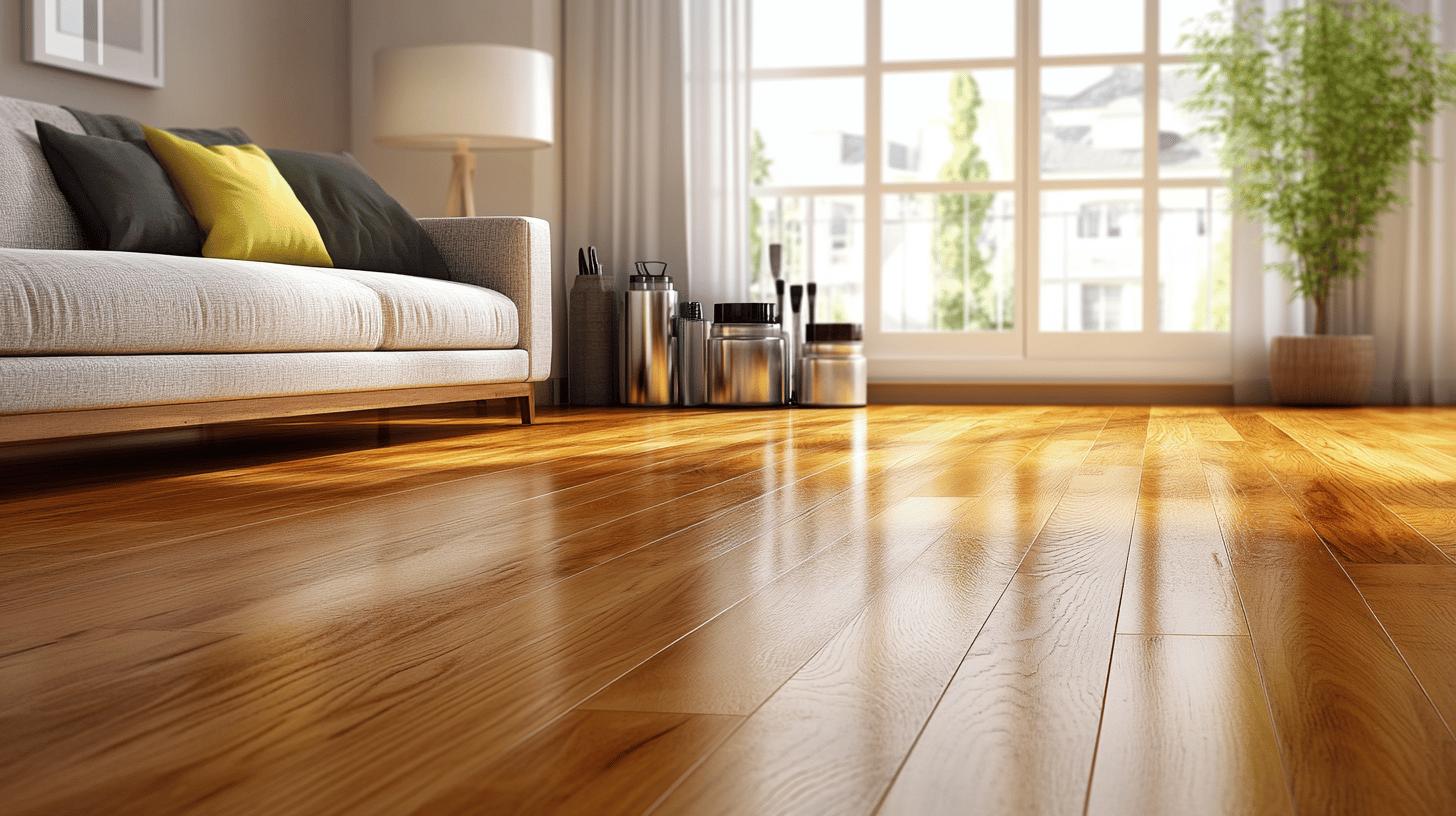
So, you’ve gone with the diamond grinder. What’s the floor going to feel like underfoot? Honestly, it’s a bit like a very, very fine sandpaper finish, but smoother. Think of it as a really clean slate. The diamond bits are super precise, so they leave a consistent, almost silky surface. It’s not rough at all, which is brilliant if you’re planning on staining or applying a clear varnish. You won’t get those annoying little scratches you sometimes see with other methods. It’s a really uniform texture, ready for whatever you throw at it next.
The Look and Feel of Belt Sanded Floors
Now, the belt sander. This is the old-school way, and it’s got its own charm. A belt sander, especially if you use a finer grit paper towards the end, can leave a lovely smooth finish. It feels good, you know? Warm and natural. However, it can sometimes leave faint lines from the belt’s direction. It’s not usually a big deal, especially if you’re going for a more rustic look or if you’re going to put a thick finish on it. It’s a different kind of smooth – more of a traditional wood floor feel, less of a ‘brand new’ feel. It’s definitely not rough, but it’s not quite the same polished feel you get from diamond grinding.
Preparing For The Final Seal
This is where the prep really pays off. Whichever method you choose, getting the floor ready for its final coat is key.
- Diamond Grinding: Because it leaves such a clean, uniform surface, it’s pretty much perfect for sealing straight away. There’s minimal dust left behind if you’ve got a good extraction system, and the surface is so even, the sealant or varnish soaks in evenly. This means no patchy bits or weird marks later on.
- Belt Sanding: You’ll want to make sure you’ve gone through a good range of grits, finishing with something quite fine (like 120 or even 180 grit). Give it a really thorough vacuum, maybe even a damp cloth wipe (but let it dry completely!). This gets rid of any lingering dust that could mess up your finish. The goal is a smooth, dust-free surface so your varnish or oil goes on like a dream.
Ultimately, both can get you to a point where you can seal the floor, but diamond grinding often gives you a bit of a head start with its inherent smoothness and cleanliness.


