Is your floor looking tired and worn out? Transforming your flooring into a stunning masterpiece might seem daunting, but with the right restoration techniques, you can achieve exceptional results. Floor restoration is more than just a superficial touch-up—it’s about bringing life back to the surface, ensuring durability, and enhancing the overall aesthetics of your home. Whether you’re dealing with scratched hardwood, faded tiles, or any other flooring issue, we’ve got you covered. In this blog post, we will delve into the most effective floor restoration techniques that promise stunning results. Let’s get started on your journey to breathtakingly beautiful floors.
Effective Floor Sanding Techniques
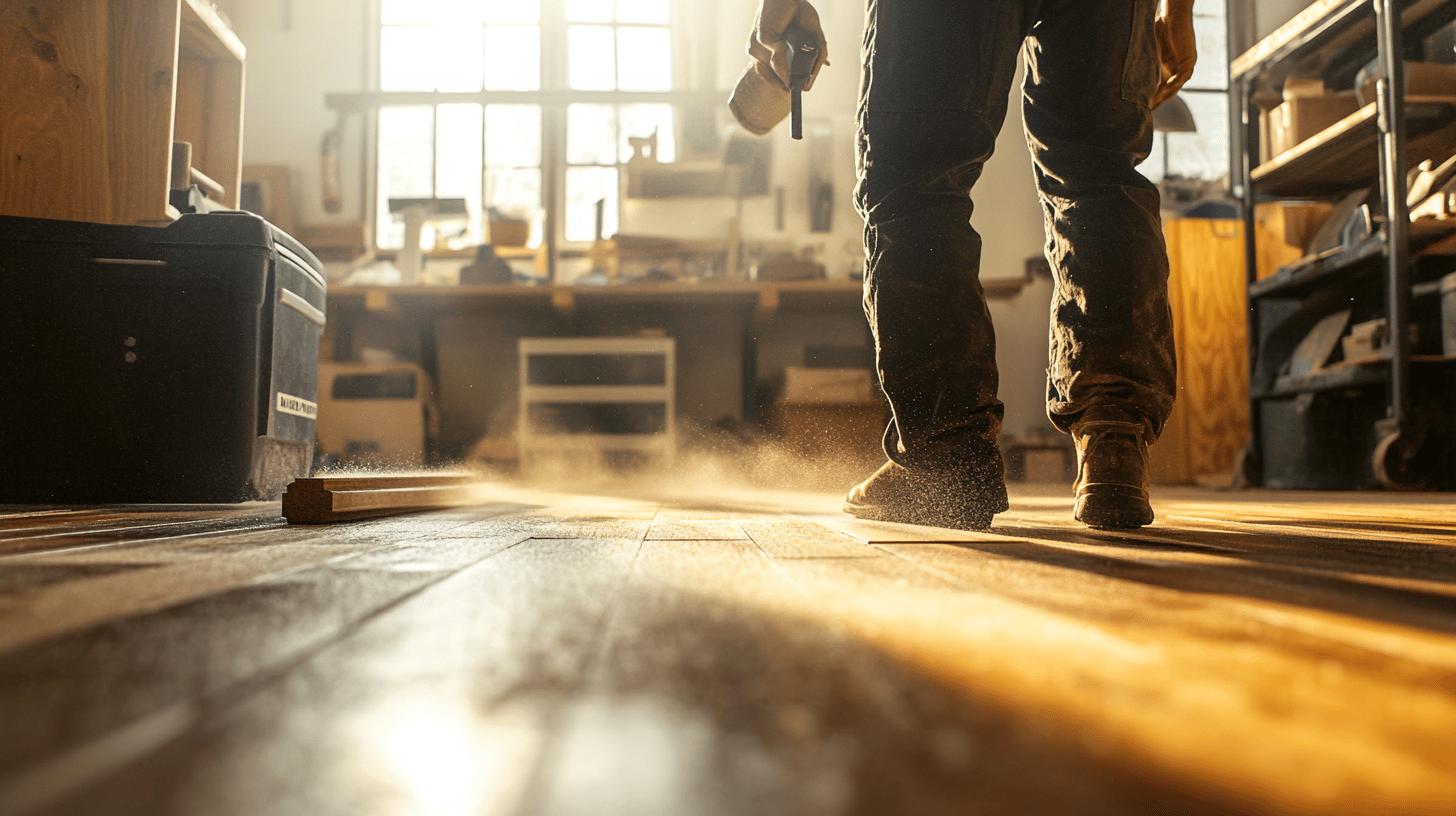
Professional sanding is a crucial step in floor restoration, as it involves removing the topmost layer of wood using abrasive materials. This process not only eliminates imperfections but also prepares the surface for staining and finishing. Sanding helps to reveal fresh wood, ensuring that the new finish adheres properly and provides a stunning result. Without proper sanding, any subsequent treatments may not bond effectively, leading to a lacklustre finish.
Modern equipment has revolutionised the sanding process, offering greater efficiency and precision. High-speed electric sanders are commonly used for large areas, delivering consistent and smooth results. Belt sanders are ideal for removing old finishes and levelling uneven surfaces, while drum sanders are perfect for heavy-duty tasks. For corners and edges, edging sanders or detail sanders come in handy, ensuring that no spot is left untreated. Always start with a coarser grit, such as 40-grit, to remove the bulk of the material, and then progress to finer grits, like 100- or 120-grit, to achieve a smooth finish.
Essential Safety Tips for Sanding Floors:
- Wear goggles, masks, and ear protection to safeguard against dust and noise.
- Ensure proper ventilation to avoid inhaling fine dust particles.
- Keep the sanding area free of flammable materials.
- Always sand in the direction of the wood grain to prevent scratches.
- Use dust containment systems to minimise airborne particles.
Dustless sanding techniques have gained popularity due to their ability to significantly reduce dust generation. These methods utilise high-powered vacuums attached to the sanders, capturing dust at the source. This not only creates a cleaner working environment but also reduces the time required for post-sanding cleanup. Additionally, dustless sanding is especially beneficial for occupied homes or commercial spaces, as it minimises disruption and enhances air quality.
Advanced Floor Staining and Polishing Techniques
Floor staining and polishing are essential steps in wood floor restoration, adding both colour and protection to the wood. Staining enhances the natural beauty of wood by bringing out its grain patterns and providing a rich, customised colour. Polishing, on the other hand, increases the floor’s shine and adds a protective layer that safeguards against wear and tear. Proper preparation, including thorough cleaning and sanding, is crucial for achieving stunning results.
Water-Based Finishes
Water-based finishes are popular for several reasons. They have low volatile organic compound (VOC) emissions, making them an eco-friendly choice. Additionally, these finishes dry quickly, allowing for faster project completion. Water-based finishes also offer a clear, non-yellowing appearance, maintaining the wood’s natural colour. Their durability and ease of application make them a favoured option for both residential and commercial projects.
UV-Cured Finishes
UV-cured finishes are another advanced option, known for their rapid drying times. These finishes are cured using ultraviolet light, which significantly reduces the waiting period for the floor to be ready for use. This makes them ideal for high-traffic areas where downtime needs to be minimised. UV-cured finishes are also highly durable, providing an excellent protective layer that resists scratches and scuffs. Their ability to withstand heavy use makes them perfect for commercial spaces.
| Finish Type | Advantages |
|---|---|
| Water-Based Finishes | Low VOC emissions, fast drying times, clear and non-yellowing appearance. |
| UV-Cured Finishes | Rapid drying times, high durability, ideal for high-traffic areas. |
Hardwood Floor Restoration: Step-by-Step
Assessing the floor’s condition is the first crucial step in the restoration process. Begin by examining the surface for typical damages such as scratches, dents, and water stains. These imperfections can determine the extent of work required. For instance, deep scratches and gouges might need filling, while extensive water damage could necessitate replacing sections of the floor. Understanding the floor’s existing finish and overall wear will guide the restoration approach, helping to choose the appropriate materials and techniques.
For successful wood floor sanding and restoration, follow these detailed steps:
- Cleaning: Start by thoroughly cleaning the floor to remove dirt, grime, and any existing coatings. Use a suitable wood floor cleaner to ensure all residues are eliminated, as this will help the new finish adhere properly.
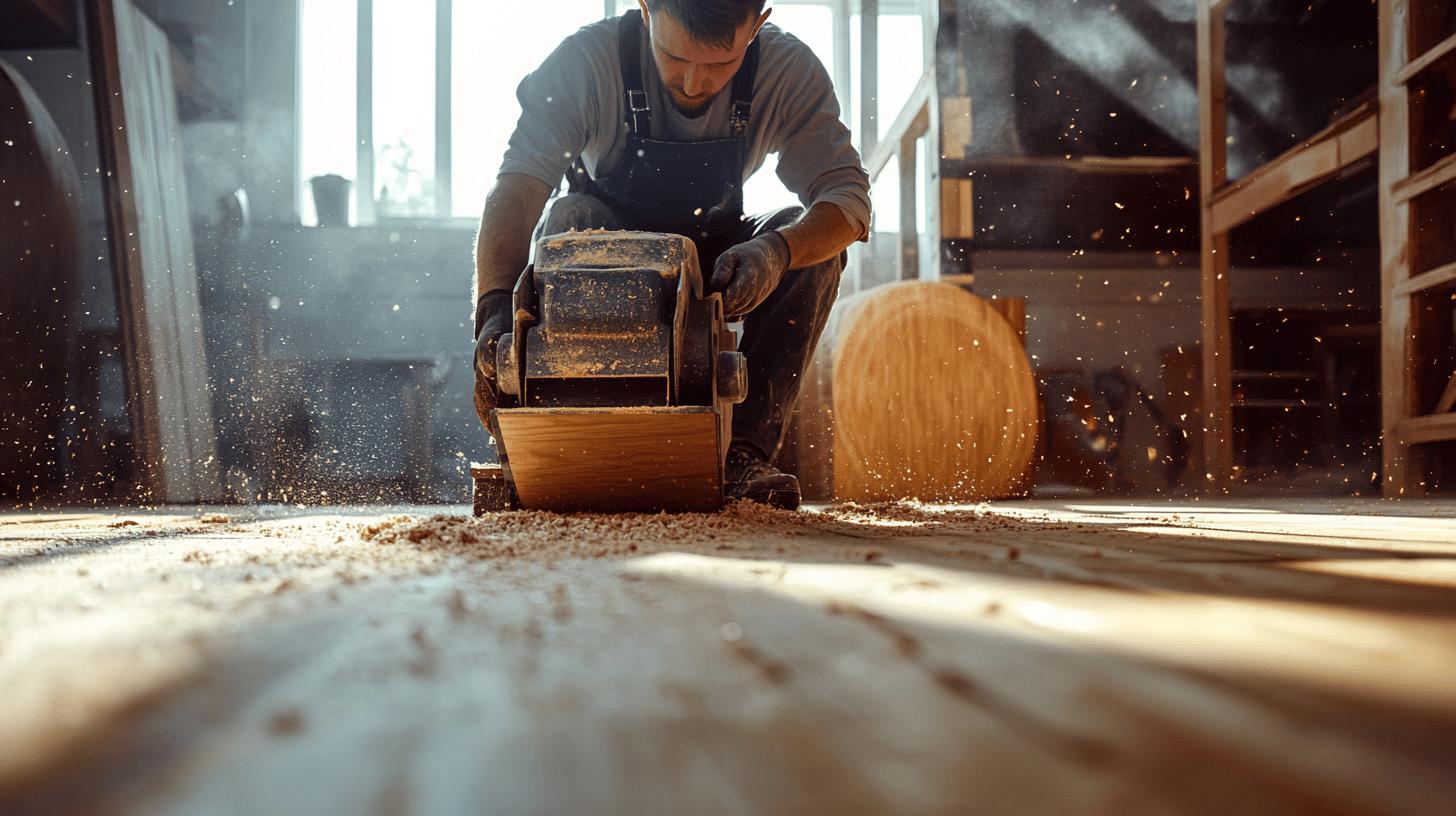
- Sanding: Sanding is essential for removing the old finish and smoothing out any imperfections. Begin with a drum sander for the main area and use an edge sander for corners and edges. Start with a coarse grit (e.g., 40-grit) to remove the old finish, then progress to finer grits (e.g., 100-grit) for a smooth surface. Ensure you sand in the direction of the wood grain to avoid scratches.
- Staining: After sanding, apply a wood stain to achieve the desired colour. Use a high-quality brush or cloth to apply the stain evenly, following the manufacturer’s instructions. Allow the stain to penetrate the wood for the recommended time before wiping off the excess.
- Finishing: Once the stain is dry, apply a protective finish to seal and protect the wood. Choose a finish that suits your needs, such as polyurethane for durability or a water-based finish for quicker drying times. Apply multiple coats, allowing each to dry thoroughly before applying the next.
Essential Tools for Hardwood Floor Restoration:
- Drum sander
- Edge sander
- Hand-held random orbital sander
- Detail sander
- Wood fillers for deep scratches and gouges
Proper finishing is paramount for ensuring the durability and appearance of the restored floor. A well-applied finish not only enhances the wood’s natural beauty but also provides a robust protective layer against future wear and damage. Multiple coats of finish will offer increased durability, making the floor more resistant to scratches, moisture, and everyday use. Taking the time to finish the floor correctly will ensure stunning results that last for years to come.
Tile and Stone Floor Restoration Techniques
Tile and stone floors often face issues such as cracks, discolouration, and stained grout. Cracks can result from heavy impacts or shifting subfloors, while discolouration is often due to prolonged exposure to sunlight or chemical reactions. Stained grout, on the other hand, is typically the result of accumulated dirt, spills, and moisture. Identifying these common issues is the first step in undertaking a successful restoration project.
Restoring tile and stone floors involves several key steps: cleaning, repairing, and sealing. Begin with a thorough cleaning to remove any dirt, grime, and old sealants. Use a cleaner that is appropriate for the specific type of tile or stone to avoid damage. Next, repair any cracks or chips using suitable fillers or adhesives. This will help restore the floor’s integrity and prevent further damage. Finally, a high-quality sealer will be applied to protect the surface from future stains and moisture. Sealing is especially crucial for porous stones like marble and limestone, which are more susceptible to staining and water damage.
Essential Grout Cleaning and Sealing Tips:
- Use a pH-neutral cleaner to avoid damaging the grout.
- Apply a grout sealer to prevent moisture penetration and stains.
- Clean spills immediately to minimize the risk of staining.
- Regularly inspect grout lines for signs of wear and reseal as needed.
Professional restoration services offer numerous benefits, ensuring a thorough and lasting restoration. Experts have access to specialised equipment and high-quality materials that may not be readily available to homeowners. They also possess the experience and skills needed to address complex issues effectively. By opting for professional services, you can achieve stunning results that enhance the appearance and longevity of your tile and stone floors.
Eco-Friendly Floor Restoration Methods
Eco-friendly floor restoration methods are becoming increasingly important due to their ability to reduce environmental impact and improve indoor air quality. Traditional restoration processes often involve the use of harsh chemicals and materials that emit volatile organic compounds (VOCs), which can be harmful to both the environment and human health. By adopting eco-friendly practices, homeowners and businesses can ensure that their restoration projects are both sustainable and safe. One popular option is water-based finishes, which have significantly lower VOC emissions compared to their oil-based counterparts. Additionally, using sustainable materials and practices helps preserve natural resources and reflects a growing commitment to environmental stewardship.
Eco-Friendly Practices:
- Water-based finishes: These finishes emit fewer VOCs, making them a healthier and more environmentally friendly choice.
- Sustainable materials: Opt for materials that are responsibly sourced and have minimal environmental impact.
- Non-toxic cleaners: Use cleaners and sealers that are free from harmful chemicals to maintain a safer home environment.
Eco-friendly floor restoration methods offer numerous benefits for both homeowners and the environment. By reducing the presence of toxic chemicals, these methods improve indoor air quality, making homes safer for occupants, especially those with allergies or respiratory issues. Furthermore, sustainable practices help conserve natural resources and reduce the overall carbon footprint of restoration projects. Embracing eco-friendly techniques not only contributes to a healthier living space but also supports broader environmental goals, ensuring a better future for generations to come.
Professional vs. DIY Floor Restoration
DIY floor restoration can be an attractive option for those looking to save costs. However, it requires a significant level of skill and experience to achieve high-quality results. DIY enthusiasts must invest time in learning the techniques, acquiring the necessary tools, and performing the work themselves. While this can be rewarding, any mistakes made during the restoration process can lead to additional expenses and subpar outcomes. On the other hand, professional floor restoration services come with a higher upfront cost but offer the expertise and precision needed to ensure a flawless finish. Professionals understand the complexities of different restoration techniques and are equipped with advanced tools to handle various challenges effectively.
Situations Where Professional Services Are Recommended:
- Extensive damage: When floors have deep scratches, significant water damage, or structural issues.
- High-value flooring: For expensive or rare floor materials that require specialised care.
- Large areas: Restoring large spaces can be time-consuming and physically demanding for DIYers.
- Time constraints: When quick turnaround is necessary, professionals can complete the job efficiently.
Ryan’s Restoration is a prime example of a service provider that delivers top-notch professional results. Their team of experts ensures thorough and meticulous work, using high-quality materials and advanced techniques. By choosing Ryan’s Restoration, homeowners can achieve long-lasting and stunning floors without the hassle and uncertainty of DIY attempts. The assurance of professional craftsmanship not only enhances the aesthetic appeal but also contributes to the durability and longevity of the restored floors.
Final Words
Effectively restoring floors involves a range of techniques tailored to different materials and conditions. From sanding to staining and polishing, each method enhances both the appearance and durability of flooring.
The detailed steps and precautions highlight the importance of proper equipment, safety measures, and procedural knowledge.
Choosing between DIY and professional services depends on skill level and project complexity.
For those seeking efficiency and expertise, professional services like Ryan’s Restoration offer remarkable results.
Mastering these floor restoration techniques ensures lasting beauty and value for any floor.
Transform your floors today – Contact Ryan’s Restoration for expert floor restoration services!
Wooden Floor Restoration FAQ
Q: What are some laminate floor restoration techniques?
A: Laminate floor restoration techniques include:
- Cleaning to remove dirt and grime
- Using scratch repair kits
- Applying polishing compounds to restore shine and minimise minor damages
Q: What are common wood floor restoration techniques?
A: Common wood floor restoration techniques involve:
- Sanding to remove the worn surface
- Staining to add colour
- Sealing to protect the floor from further damage
Q: How can hardwood floors be restored?
A: To restore hardwood floors:
- Assess the damage
- Clean thoroughly
- Sand the surface
- Fill in gaps or cracks
- Apply stain
- Add a protective finish
Q: What techniques are there for wooden floor restoration?
A: Wooden floor restoration techniques include:
- Sanding the surface
- Applying stains or finishes
- Using specialised tools for edge sanding and detailed areas
Q: How do you repair worn wooden floors?
A: Repairing worn wooden floors involves:
- Sanding down the top layer
- Filling in cracks or gaps with wood filler
- Applying a fresh coat of stain
- Adding a protective finish
Q: What is the process for parquet flooring restoration?
A: Parquet flooring restoration process:
- Sand to remove the top layer
- Repair individual parquet blocks if needed
- Stain to restore colour
- Seal for protection
Q: Can I restore wooden floors DIY?
A: Yes, DIY wooden floor restoration is possible with the right tools and materials. Follow these steps:
- Clean thoroughly
- Sand the surface
- Apply stain
- Seal for protection
Q: How do you restore oak floors?
A: Restoring oak floors involves:
- Sanding down the top layer to remove scratches and wear
- Applying a stain to enhance the colour
- Sealing to protect the finish


