So, you’ve got these gorgeous Douglas fir floorboards in your loft conversion, but they’re looking a bit tired? Don’t worry, bringing them back to life is totally doable. It might seem like a big job, but with a bit of know-how, you can make them look amazing again. This guide will walk you through the whole douglas fir floor restoration process, from checking out the wood to keeping it looking good for years. Let’s get those floors shining!
Key Takeaways
- First, take a good look at your floors. See what kind of damage there is, if any old fixes are already there, and just get a feel for the wood’s story.
- Get your tools ready. You’ll need some basic stuff for sanding, the right sandpaper, and definitely some safety gear like goggles and a mask.
- Sanding is where the magic happens. Start with rough sandpaper and work your way to finer grits. Don’t forget the edges!
- Picking a stain and finish is important for making that beautiful Douglas fir pop. Always test your choices in a hidden spot first.
- Once they’re restored, keep them clean with regular sweeping and occasional deeper cleans. Protect them from scratches and spills to keep them looking great.
Assessing Your Douglas Fir Floor’s Condition
Before you even think about grabbing a sander or a can of finish, you gotta get a good look at what you’re working with. Douglas fir floors, especially in older homes or loft conversions, have seen some life. Checking them out properly now saves you headaches later.
Identifying Wear and Tear
Look for the usual suspects: scratches, dents, and scuffs. These are pretty normal, especially in high-traffic areas. You might see some deeper gouges from furniture being dragged or dropped items. Also, check for any areas where the wood looks worn down, almost smooth, which happens from years of foot traffic. The goal is to see how widespread this damage is.
- Scratches: From light surface marks to deeper cuts.
- Dents: Where something heavy has pressed into the wood.
- Worn Areas: Often around doorways or main pathways.
- Cupping/Crowning: Where the edges of the boards are higher or lower than the center, usually due to moisture changes.
Spotting Previous Repairs
Sometimes, folks have tried to fix things before. You might find patches of different wood, old filler that’s cracked or shrunk, or even areas where boards were replaced. Sometimes, you’ll see old nails or staples that weren’t fully removed. These aren’t necessarily bad, but you need to know they’re there so you don’t mess up your tools.
- Look for mismatched wood grain or color.
- Check for old putty or filler that’s popped out or looks crumbly.
- See if any nails or staples are sticking up even a little bit.
Understanding Wood’s History
Think about the life this floor has lived. Was it a busy family home? A workshop? Knowing its past can give you clues about the kind of wear you’re seeing. For instance, a floor in an old workshop might have more deep scratches and stains than one in a quiet bedroom. Also, pay attention to the direction of the wear. Is it consistent, or are there odd patterns?
Sometimes, you’ll find old finishes or layers of paint that have been applied over the years. These need to be accounted for during the sanding process, as they’ll affect how the wood takes to new finishes.
Gathering Your Douglas Fir Floor Restoration Toolkit
Alright, so you’ve decided to tackle those beautiful Douglas fir floorboards in your loft conversion. Awesome! Before you get too excited and start grabbing random tools, let’s talk about what you’ll actually need. Having the right gear makes all the difference between a weekend project gone wrong and a floor you’ll be proud of. It’s not just about having stuff; it’s about having the right stuff.
Essential Tools for the Job
Think of this as your starter pack. You don’t need a professional workshop, but a few key players will make your life way easier.
- Orbital Sander: This is your workhorse. A good quality orbital sander will handle the bulk of the sanding. Look for one that’s comfortable to hold and has decent power.
- Edge Sander: Floors aren’t just big open spaces; you’ve got edges and corners to deal with. An edge sander gets into those tight spots where the big sander can’t reach.
- Vacuum Cleaner with a HEPA Filter: Sanding creates a ton of dust. A good vacuum will help you keep the air cleaner and prep the floor between sanding stages.
- Putty Knife or Scraper: For getting rid of old gunk, dried paint drips, or loose bits of filler.
- Hammer and Nail Set: You might need to tap down any proud nails or fill small holes.
- Paint Brushes and Rollers: For applying your chosen finish.
- Buckets and Rags: For cleaning and applying finishes.
Choosing the Right Abrasives
This is where things can get a little tricky, but it’s super important. You’ll be using sandpaper, but not just any sandpaper. You need different grits for different jobs.
- Coarse Grit (e.g., 36-60): This is for the heavy lifting – taking off old finishes, leveling out uneven boards, or dealing with deeper scratches. Use this sparingly.
- Medium Grit (e.g., 80-100): Good for general sanding and removing the marks left by the coarse grit.
- Fine Grit (e.g., 120-150): This is for smoothing out the wood and preparing it for finishing. You want the floor to feel nice and smooth at this stage.
- Very Fine Grit (e.g., 180-220): Sometimes used for a final polish before applying the finish, especially if you’re going for a really smooth look.
Always work your way up through the grits. Don’t skip steps, or you’ll end up with a rough finish.
Safety Gear You Can’t Skip
Seriously, don’t mess around with this. Wood dust isn’t just annoying; it can be bad for your lungs. Plus, you’re working with tools that can cause injury.
- Safety Glasses: Protect your eyes from flying dust and debris. No exceptions.
- Dust Mask or Respirator: A good quality mask is a must. A respirator offers even better protection, especially if you’re sensitive or working in a confined space like a loft.
- Work Gloves: Protect your hands from splinters and give you a better grip on tools.
- Knee Pads: You’ll be spending a lot of time on your knees. Save yourself some pain!
- Ear Protection: Sanders can be loud. Earplugs or earmuffs will save your hearing in the long run.
Working with old wood can be rewarding, but it’s also dusty work. Make sure you’ve got good ventilation in your loft space, especially when you’re sanding. Open windows and doors if you can, and consider using fans to help move the air and dust away from you. It makes the whole process more pleasant and safer.
So, gather your supplies, put on your safety gear, and get ready to bring those Douglas fir floorboards back to life!
The Art of Sanding Douglas Fir Floorboards
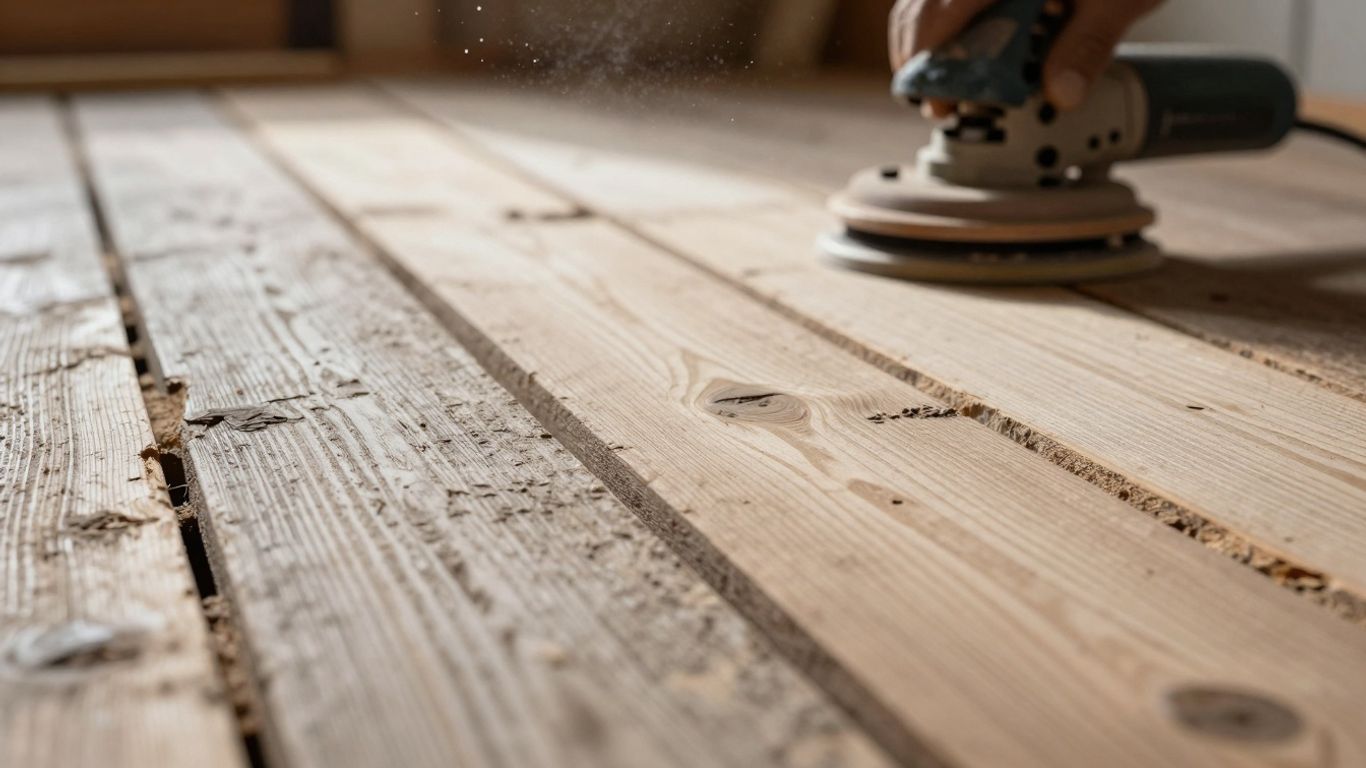
Alright, let’s talk about sanding. This is where the magic really starts to happen with your Douglas Fir floors. It might seem like just a lot of elbow grease, but there’s a bit of a knack to it, especially with this type of wood. Getting it right means a smooth, beautiful finish that’ll last. Mess it up, and you might be looking at more work down the line.
Starting with Coarse Grit
So, you’ve got your floor all prepped, right? No nails sticking out, no staples. Good. Now, grab your sander and the coarsest grit sandpaper you’ll need. For Douglas Fir, which can sometimes be a bit soft or have old finishes, starting with something like 36-grit or 40-grit is usually the way to go. This is all about taking off the old gunk – any varnish, paint, or just years of grime. Don’t rush this step. You want to get the bulk of the imperfections off evenly. Work with the grain of the wood, making sure you overlap your passes slightly. If you have a drum sander, go slow and steady. For a random orbital sander, you can move a bit quicker, but still, pay attention to what you’re doing. You’re looking for a consistent look across the entire floor, no shiny spots where the old finish is still clinging on.
Moving to Finer Grits
Once you’ve gone over the whole floor with that coarse grit, it’s time to smooth things out. You’ll step down to a medium grit, maybe 60 or 80. This is where you start to really refine the surface, getting rid of those deeper scratches left by the coarse paper. Again, work with the grain. After that, you’ll move to finer grits. Think 100, then maybe 120 or even 150 if you’re going for a super-smooth finish. Each step removes the scratches from the previous one. It’s like peeling an onion, layer by layer, but way more satisfying. You’ll notice the wood starting to look and feel much smoother as you go up in grit.
Edge Sanding and Detail Work
Now, your big floor sander can’t get into all the nooks and crannies, like along the walls or around pipes. That’s where an edger sander comes in. You’ll use the same grit progression here as you did with the main sander. It takes a bit more control, but it’s important to get these edges looking just as good as the main floor. For really tight spots, like corners or around door frames, you might need a detail sander or even just a sanding block with sandpaper wrapped around it. The goal is to make the entire floor look like one continuous, smooth surface. If you skip these details, you’ll see them later, and it’ll bug you every time you look at it.
Bringing Out the Natural Beauty of Douglas Fir
Okay, so you’ve gotten your Douglas Fir floorboards looking smooth and clean after all that sanding. Now comes the fun part: making them look amazing! Douglas Fir has this gorgeous, warm tone naturally, and we want to bring that out, not cover it up. It’s all about highlighting the wood’s character.
Stain Selection for Warmth
When you’re thinking about stain, remember that Douglas Fir can take stain a bit differently than other woods. It’s got some dense grain and some softer areas, so a stain might look darker in some spots. This isn’t necessarily a bad thing; it can add depth! For that classic warm look, you’re probably going to want to lean towards warmer tones. Think about colors that mimic honey, amber, or even a light walnut. Avoid anything too gray or too cool, as it can make the wood look a bit dull.
- Golden Oak: A safe bet for a natural, warm glow.
- Honey: Brings out the natural yellow undertones.
- Light Walnut: Adds a bit more depth without going too dark.
- Amber: Gives a rich, inviting feel.
Achieving a Natural Look
If you’re aiming for that ‘just sanded, but better’ vibe, sometimes the best approach is to use a clear coat or a very light, natural-toned stain. The goal here is to protect the wood while letting its natural color and grain patterns shine through. You don’t want it to look like you’ve painted it; you want it to look like the best version of itself. A good quality polyurethane or a hardwax oil can do wonders here. They seal the wood, give it a bit of sheen, and protect it from spills and wear.
Sometimes, less is more. Don’t feel pressured to go with a dark, dramatic stain if that’s not the vibe you’re going for. The natural beauty of Douglas Fir is often its biggest selling point, especially in a loft conversion where you might want to keep things feeling light and airy.
Testing Stains in Unseen Areas
Seriously, don’t skip this step. Before you commit to staining the whole floor, grab some scrap pieces of the same wood, or find a spot that’s usually covered by furniture, like inside a closet or under a rug. Apply your chosen stain (and finish, if you’re testing that too) to these test spots. Let them dry completely. This is the only way you’ll know for sure how the stain will look on your specific floorboards. Wood is like people; it’s got its own personality, and stain reacts differently to each piece. You might think a “Honey” stain will look one way, but on your floor, it could come out a little more orange or a little more brown. Seeing it in person, on your actual floor, is the only way to be sure.
Applying the Perfect Protective Finish
Alright, so you’ve gone through the sanding process, and your Douglas Fir floorboards are looking pretty sweet. Now comes the part that really seals the deal and keeps them looking good for ages: the finish. This isn’t just about making them shiny; it’s about protecting all that hard work you just put in. Choosing the right finish and applying it right is super important.
Understanding Finish Options
There are a few main types of finishes you’ll run into, and each has its own vibe and level of protection. It’s good to know what you’re getting into before you start slathering stuff on.
- Polyurethane: This is probably the most common choice. It’s tough, durable, and comes in different sheens like matte, satin, semi-gloss, and gloss. Water-based poly dries faster and has less odor, while oil-based poly tends to be a bit more durable and gives a warmer tone, but it takes longer to dry and smells stronger.
- Hardwax Oils: These are becoming really popular. They soak into the wood, giving it a natural, matte look that feels really smooth. They’re easier to repair if you get a scratch later on, but they might not offer quite the same level of heavy-duty protection as polyurethane, especially in high-traffic areas.
- Varnish: Similar to polyurethane, but often a bit more traditional. It sits on top of the wood and provides a protective layer.
Application Techniques for Durability
How you put the finish on matters a lot. You want an even coat, no drips, and good coverage. Thin, even coats are always better than one thick, gloppy one.
Here’s a general rundown:
- Prep is Key: Make sure your floor is dust-free. Seriously, vacuum and then wipe it down with a tack cloth. Any dust trapped under the finish will be there forever.
- Work in Sections: Don’t try to do the whole room at once. Work from the back of the room towards the exit so you don’t trap yourself.
- Use the Right Tool: Whether it’s a good quality brush, a roller, or a special applicator pad, make sure it’s designed for the finish you’re using. For polyurethane, a good synthetic brush or a foam roller works well. For hardwax oils, a natural bristle brush or a microfiber applicator is often recommended.
- Apply Thinly and Evenly: Follow the grain of the wood. Avoid overworking the product, which can lead to streaks or bubbles.
- Light Sanding Between Coats: After each coat dries (check the product instructions for timing), you’ll want to lightly sand with a very fine grit sandpaper (like 220 or higher) or a sanding screen. This knocks down any little bumps or dust nibs and helps the next coat adhere better. Wipe away all the dust afterward.
Allowing Proper Curing Time
This is where patience really pays off. The finish might feel dry to the touch pretty quickly, but it’s not fully hardened yet. This is the curing process.
- Light Foot Traffic: Usually, you can walk on the floor in socks after 24-48 hours, but be super careful. Avoid shoes, especially those with rubber soles, as they can stick to the finish.
- Furniture Placement: Wait at least 3-7 days before putting furniture back. Use felt pads on the bottom of all furniture legs to prevent scratches.
- Heavy Use: It can take up to 30 days for the finish to fully cure and reach its maximum hardness. During this time, be extra gentle with the floor. Avoid dragging anything heavy across it and clean up spills immediately.
Rushing the curing process is a common mistake that can lead to premature wear and tear, no matter how good the finish is. Think of it like letting a good meal digest properly – it’s a necessary step for the best results.
So, take your time with this last step. A well-applied finish will protect your beautiful Douglas Fir floors and keep them looking great for years to come.
Maintaining Your Restored Douglas Fir Floors
So, you’ve gone through all the trouble to get your Douglas fir floors looking amazing again. Awesome! Now, the big question is, how do you keep them that way? It’s not rocket science, but a little bit of know-how goes a long way in keeping those boards looking good for years to come. Think of it like taking care of a classic car; a bit of regular attention prevents major headaches down the road.
Daily Cleaning Habits
This is where you can really make a difference with minimal effort. The goal here is to stop dirt and grit from becoming tiny little sandpaper particles that scratch up your beautiful finish.
- Sweep or vacuum regularly. Seriously, just a quick sweep with a soft-bristle broom or a vacuum cleaner with a hard floor attachment can pick up most of the daily dust and debris.
- Wipe up spills immediately. Don’t let liquids sit around. A damp cloth is usually all you need. For Douglas fir, especially if it’s sealed well, this is usually enough to prevent stains.
- Use doormats. Put them at all entrances, inside and out. They catch a surprising amount of dirt before it even gets onto your floors.
Periodic Deep Cleaning
Once in a while, you’ll want to give your floors a more thorough clean. This isn’t something you need to do every week, maybe once or twice a year, depending on how much traffic your loft gets.
- Choose the right cleaner. You want something pH-neutral. Harsh chemicals can strip away the finish you worked so hard to apply. Many wood floor manufacturers make specific cleaners, or you can often find good options at your local hardware store. Always check the label to make sure it’s safe for finished wood floors.
- Use a damp mop, not a soaking wet one. The key is damp. You don’t want to flood your floors. Wring out your mop really well so it’s just slightly moist. Work in sections, and dry any excess moisture with a clean towel if needed.
- Consider a wood floor polish. If your floors are looking a bit dull after a deep clean, a good quality wood floor polish can bring back some of that shine. Make sure it’s compatible with your finish type.
Protecting Against Future Damage
Prevention is always better than cure, right? A few simple steps can save your floors from a lot of potential harm.
- Furniture pads are your best friend. Stick felt pads on the bottom of all your furniture legs – chairs, tables, sofas, anything that moves. This stops scratches and dents when you shift things around.
- Be mindful of pet nails. If you have furry friends, keep their nails trimmed. Long, sharp nails can scratch even the toughest finishes.
- Avoid high heels and cleats. This might sound obvious, but it’s worth mentioning. Stiletto heels can put a lot of pressure on floorboards and leave dents. And definitely no cleats indoors!
Keeping your Douglas fir floors looking great is all about consistent, gentle care. It’s less about intense scrubbing and more about regular, light maintenance. Think of it as a partnership with your floor – you look after it, and it keeps looking beautiful.
Here’s a quick rundown of what to avoid:
- Steam mops (the heat and moisture can damage the wood and finish).
- Abrasive cleaners or scouring pads (these will scratch the surface).
- Excessive water (standing water is the enemy of wood floors).
- Wax-based cleaners on polyurethane finishes (they can build up and create a dull, sticky layer).
Keeping your restored Douglas Fir floors looking great is simple. Regular sweeping and occasional damp mopping will do wonders. For tougher spots, a gentle cleaner made for wood floors is your best bet. Remember, avoiding harsh chemicals and excessive water is key to their long-term beauty. Want to learn more about keeping your floors in top shape? Visit our website for detailed guides and tips!
Wrapping It Up
So, there you have it. Bringing those old Douglas fir floorboards back to life in your loft conversion can really make a difference. It’s not always a quick job, and sometimes you might run into a few surprises, but the end result is totally worth it. A good sanding, maybe a bit of patching, and the right finish can turn tired wood into something special. If you’re feeling a bit unsure, don’t be afraid to call in someone who knows their stuff. But if you’re up for a project, go for it! You’ll have a unique floor that adds tons of character to your new space.
Frequently Asked Questions
Can I really do this myself, or should I hire someone?
You totally can tackle this yourself if you’re up for a bit of hard work! But hey, if you’re short on time or just want a pro job, hiring someone who knows their stuff is always an option. They’ve got the fancy tools and the experience to make it look amazing.
What’s the biggest mistake people make when fixing up old wood floors?
A super common slip-up is going too fast with the sanding. People often start with sandpaper that’s too rough, or they don’t move through the grits smoothly. This can leave your floor looking all scratched up and uneven, which is a real bummer.
How do I know if my Douglas Fir floor is too far gone to save?
Don’t sweat it too much! Most Douglas Fir floors can be brought back to life. Unless the wood is completely rotten, full of holes from bugs, or just falling apart, you can probably fix it up. Even floors with lots of dents and scratches can look great after sanding and refinishing.
What’s the deal with stains? Do I have to use one?
Nope, you don’t have to! Douglas Fir has a really pretty natural color. You can just put a clear protective coat on it to keep it looking like itself. But if you want a different vibe, stains can add warmth or change the color. Just remember to test them first!
How long will it take for the finish to dry and be ready to walk on?
Patience is key here! Most finishes need at least 24 hours to dry enough for light foot traffic. But for furniture and heavy stuff, you might need to wait a few days, or even a week, depending on the product. Always check the can for the specific drying times.
What’s the easiest way to keep my newly fixed floor looking good?
Keep it clean, simple! Sweep or vacuum regularly to get rid of dirt and grit that can scratch the wood. Use a damp mop (not soaking wet!) with a wood floor cleaner when needed. And try to put pads under furniture legs to prevent dents.


