So, you’ve got a beautiful hardwood floor in your UK home and you want it to look its absolute best. Sanding is a big part of that, but it’s not just about rubbing sandpaper on the wood. There’s a whole science to it, especially when it comes to the grit you use. Get it wrong, and your floor might end up looking worse than when you started. We’re going to walk through how the right floor sanding grit sequence makes all the difference for that perfect finish.
Key Takeaways
- Starting with a coarser grit is important for taking off old finishes or major unevenness.
- You need to move up through the grits gradually to get a smoother surface each time.
- The right floor sanding grit sequence for UK hardwood usually starts coarse and ends very fine.
- Using low-quality sandpaper or skipping grit steps can lead to a bad finish.
- How you sand and manage dust also plays a big role, not just the grit numbers.
Understanding The Grit Progression
Alright, let’s talk about how we get that super smooth finish on UK hardwood floors. It’s not just about slapping sandpaper on a machine and hoping for the best. There’s a real method to the madness, and it all starts with understanding the grit progression. Think of it like peeling an onion, but instead of crying, you’re getting a beautiful floor.
Why Starting Coarse Matters
So, why do we even bother with those really rough grits, like 24 or 36? It might seem counterintuitive, right? You want smooth, so why start with something that feels like sandpaper from the Stone Age? Well, these coarse grits are your heavy hitters. They’re designed to tackle the big stuff – old finishes, deep scratches, unevenness, maybe even some old glue residue. If your floor has seen better days, you absolutely need these coarse grits to level the playing field. Trying to skip this step is like trying to paint a masterpiece on a lumpy wall; it just won’t work. You’ll end up with a finish that’s bumpy and uneven, no matter how much you try to smooth it out later.
The Importance Of Stepping Up
Once you’ve dealt with the major issues using those coarse grits, it’s time to move on. This is where the ‘progression’ part really kicks in. You don’t jump straight from a 36 grit to a super fine 120 or 180. That would just undo all the work you just did! Instead, you make gradual steps. Think of it like this:
- From 36 to 60: This grit starts to smooth out the deeper scratches left by the 36. It’s still removing wood, but much more gently.
- From 60 to 80: Now we’re getting somewhere. The 80 grit refines the surface further, making it noticeably smoother and preparing it for the next stage.
- From 80 to 100/120: This is often the last step before we go really fine. It really starts to feel smooth to the touch.
Each step is about refining the work of the previous one. You’re essentially erasing the scratches left by the coarser grit with the next finer one. It’s a process of refinement, getting rid of the evidence that you were ever using aggressive tools.
Fine-Tuning With Finer Grits
After you’ve worked your way up through the medium grits (usually ending around 100 or 120), you’re ready for the real polishing. This is where you get that silky-smooth feel that makes a hardwood floor look and feel amazing. Grits like 150, 180, and sometimes even 220 are used here. They don’t remove much wood at all; instead, they act more like a polish. They buff the surface, closing the pores of the wood and creating a uniform sheen. This is the stage that really makes the wood grain pop and prepares it for whatever finish you plan to apply. Skipping these finer grits means your finish might not adhere as well, or it could look dull. It’s the difference between a floor that looks good and one that looks truly professional.
Choosing The Right Abrasives For Your Wood
Alright, so you’ve got your UK hardwood floor, looking all beautiful and ready for some love. But before you grab just any sandpaper, let’s talk about picking the right stuff. It’s not just about grabbing the cheapest pack; the sandpaper you choose makes a big difference in how your floor ends up looking. Think of it like picking the right tool for a job – use the wrong one, and you’ll be making more work for yourself.
Matching Grit To Wood Type
Different woods have different personalities, right? Some are softer, some are harder. For our tough UK hardwoods, you generally want to start with something a bit more aggressive. This isn’t the time to be gentle. You’re trying to knock down the high spots, get rid of old finishes, or maybe even some minor damage. Starting with a coarser grit is key to getting the job done efficiently. For really tough jobs or very rough wood, you might even start with 36 or 40 grit. For wood that’s in decent shape, 60 or 80 grit is often a good starting point. It’s all about removing material without digging too deep or creating too many scratches that the next grit can’t handle.
When To Switch Sandpaper Grades
This is where people sometimes get tripped up. You don’t just keep sanding with the same grit forever. The idea is to move up through the grits, getting smoother and smoother. A good rule of thumb is to switch when you can no longer see the scratches from the previous grit. If you can still see those deeper marks, keep going with the current grit. Once those are gone, it’s time to move up. For a typical hardwood floor, you might go from 60 to 80, then 100, maybe 120, and sometimes even higher depending on the finish you’re aiming for. Don’t rush this. Skipping grits is a recipe for disaster, leaving you with a floor that looks okay from a distance but shows its flaws up close.
Here’s a general idea of what each grit range is good for:
- Coarse (20-40 grit): For heavy-duty work like removing old finishes, deep scratches, or warped boards.
- Medium-Coarse (50-80 grit): Good for initial flattening and removing moderate imperfections on most hardwoods.
- Medium (100-120 grit): Starts to smooth out the surface, preparing it for finer grits.
- Fine (150-220 grit): Creates a really smooth surface, ready for staining or sealing.
The Role Of Grit Quality
Not all sandpaper is created equal, believe it or not. Cheaper sandpaper might load up with dust faster, meaning you’re not actually sanding as effectively. The grit might also break down unevenly. For a professional-looking finish on your UK hardwood, investing in good quality sandpaper is worth it. Look for brands that use durable abrasive grains and good backing material. This means the sandpaper will last longer and give you a more consistent result. It’s a small detail, but it adds up when you’re trying to get that flawless finish.
Mastering The Floor Sanding Grit Sequence
Alright, so you’ve got your floor sander ready to go, and you’re wondering about the order of operations. It’s not just about grabbing any sandpaper; there’s a definite sequence that makes all the difference for a top-notch UK hardwood finish. Think of it like building something – you start with the rough stuff and gradually get more precise.
The Essential Grit Sequence For UK Hardwood
For most UK hardwoods, you’re going to want to follow a pretty standard progression. This isn’t a hard and fast rule for every single situation, but it’s a solid starting point that works wonders. We’re talking about moving from coarse to medium, and then finally to fine grits. Skipping steps here is where things can go wrong, leading to more work later.
Here’s a typical sequence you’ll see:
- 36-grit: This is your heavy hitter. It’s for taking off old finishes, deep scratches, or any major unevenness. Don’t be shy with this one if you need it, but don’t leave it on longer than necessary.
- 60-grit: After the 36, you’ll step down to 60. This starts to smooth out the marks left by the coarser grit and gets the surface ready for the next stage.
- 80-grit: This is where things start feeling noticeably smoother. It refines the surface further, removing any remaining deeper scratches.
- 100-grit (or 120-grit): This is your final sanding grit before any finishing. It really polishes the wood, making it feel super smooth to the touch. For some projects, you might even go up to 150-grit, but 100 or 120 is usually plenty for a great finish.
Avoiding Common Grit Mistakes
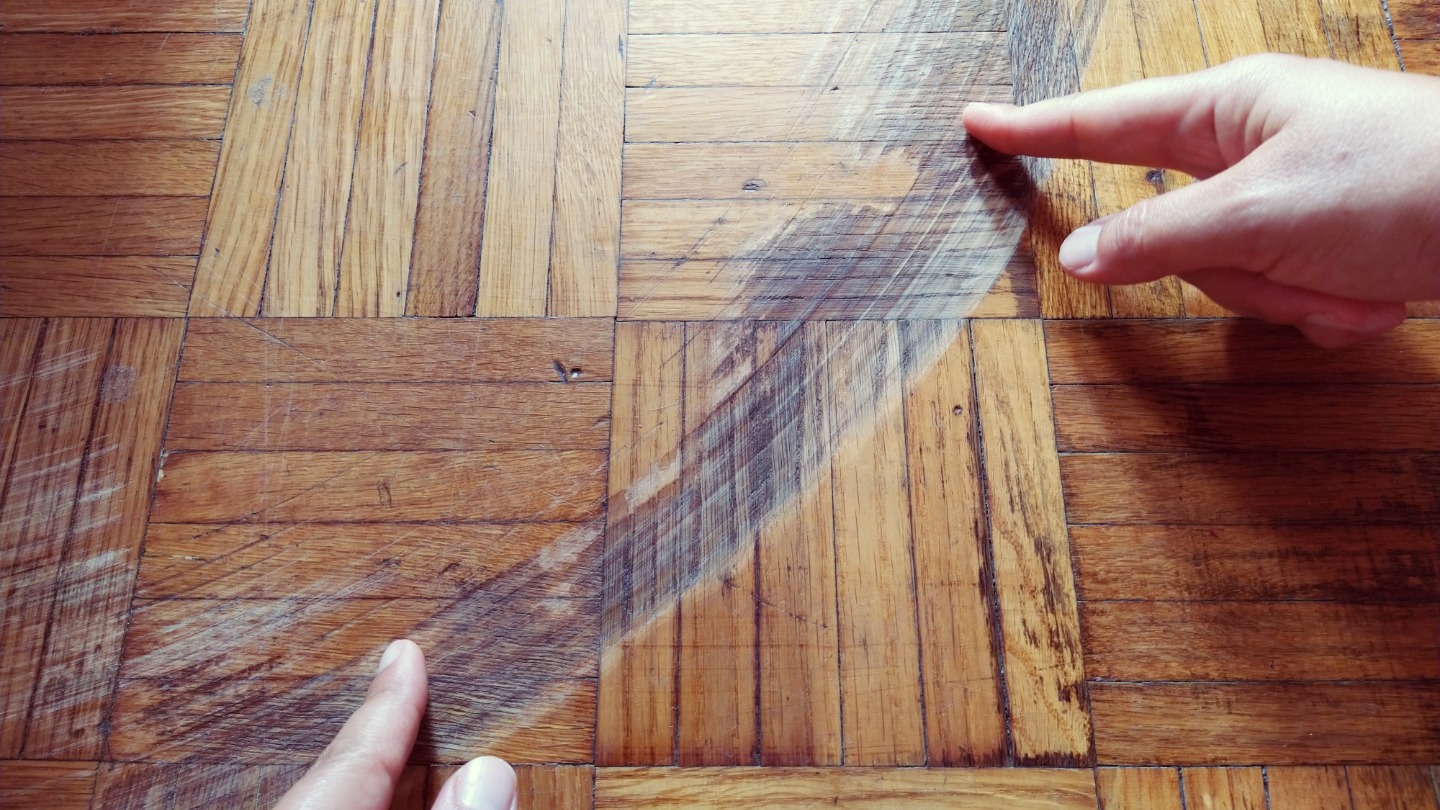
People mess this up more often than you’d think. The biggest mistake is jumping too far between grits. If you go from 36 straight to 100, you’re going to leave deep scratches that the 100-grit just can’t handle. It’s like trying to paint over a big dent without filling it first – it just won’t look right. Another common slip-up is not cleaning the floor properly between grits. Sawdust can get ground into the wood, causing a dull finish. Always vacuum thoroughly!
The key is patience. Each grit has a job, and it needs time to do it properly. Rushing the process means you’ll likely have to go back and re-sand, which is way more time-consuming than just doing it right the first time.
Achieving That Smooth Surface
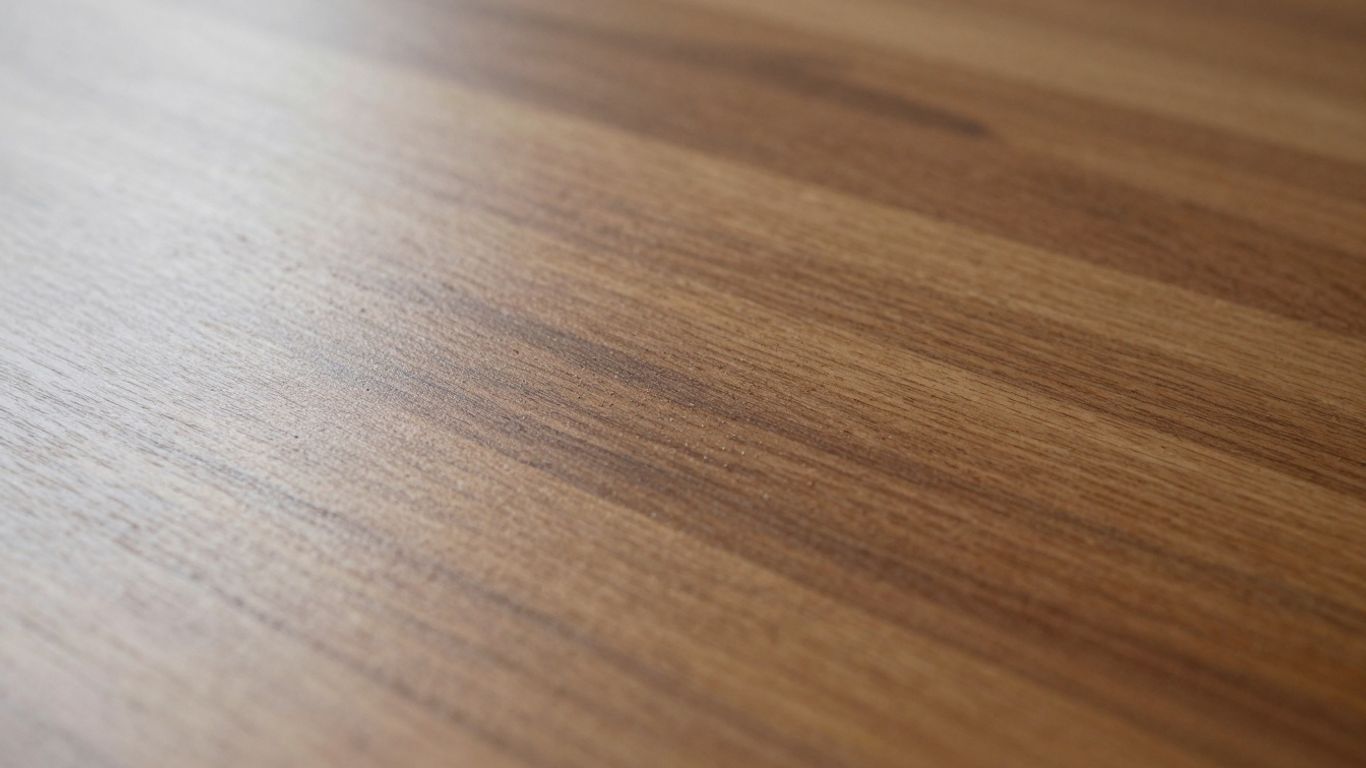
So, how do you actually get that glass-like finish? It’s all about the technique and the grit sequence. Make sure you’re sanding with the grain of the wood, not against it or across it. For the initial coarse grits, you might go in different directions to get the bulk of the material off, but as you move to finer grits, always, always go with the grain. This minimises visible scratches. When you’re done with your final grit, the floor should feel incredibly smooth. If it doesn’t, you might have missed a step or need to go back to a slightly coarser grit for a bit longer. The final smooth surface is the reward for following the grit progression correctly.
The Science Behind Each Grit Level
So, we’ve talked about the order and why it matters, but what’s actually happening when you move from one grit to the next? It’s not just about swapping out sandpaper; each stage is doing a specific job to get your UK hardwood floor looking its best.
Coarse Grits: Removing Imperfections
When you first start, especially if your floor has seen better days, you’re going to be using those really rough grits, like 24 or 36. Think of these guys as the heavy lifters. Their main gig is to knock down any high spots, get rid of old finishes, deep scratches, or any other major boo-boos on the wood. They’ve got big, sharp grains that chew away at the wood surface pretty aggressively. This initial aggressive removal is key to creating a level playing field for the rest of the sanding process. You’re not aiming for beauty here; you’re aiming for a flat, clean slate. It’s a bit messy, and you’ll see a lot of dust, but it’s a necessary evil to get rid of the bad stuff.
Medium Grits: Smoothing The Surface
Once you’ve gone through the coarse grits and the floor is looking a lot more even, you move onto the medium grits, maybe 60 or 80. These are your surface smoothers. They’re not as harsh as the coarse ones, so they don’t dig in as much. Instead, they focus on cleaning up the scratches left behind by the coarser grits. It’s like going from a rough towel to a softer one. You’re refining the surface, making it feel noticeably smoother to the touch. This stage is all about preparing the wood for the finer grits that are coming up. If you skip this or don’t do it well, those coarser scratches will just show up later, no matter how fine you go.
Fine Grits: Polishing To Perfection
Now we’re getting to the good stuff – the fine grits, like 100, 120, and even up to 180 or 220 for a really polished look. These grits are all about the finish. Their grains are tiny and packed closely together. They don’t remove much wood at all; instead, they gently buff the surface, removing any faint scratches left by the medium grits and really opening up the wood grain. This is what gives you that silky-smooth feel that makes you want to walk barefoot on your floor. It’s the final polish that makes the wood look alive and ready for whatever sealant or finish you plan to apply. It’s the difference between a sanded floor and a floor that looks professionally done.
Don’t underestimate the power of a good progression. Rushing through grits or using worn-out sandpaper at any stage will sabotage your efforts. Each grit has a specific purpose, and respecting that order is non-negotiable for a top-notch result.
Beyond The Grit: Other Finishing Factors
The Impact Of Sanding Technique
So, you’ve got the right grits, you’re moving up the ladder like a pro. But hold on, how you actually move that sander makes a big difference. Pushing too hard or going too fast can leave swirl marks, even with the finest sandpaper. Think of it like petting a cat – you want to be gentle and consistent, not rough and erratic. Always sand with the grain of the wood, never against it. If you’re using a belt sander, keep it moving. Don’t let it sit in one spot, or you’ll dig a divot. Orbital sanders are a bit more forgiving, but the same principle applies: steady, even pressure and always following the wood’s natural lines.
Dust Management For A Cleaner Finish
This is the part nobody really talks about, but it’s a big deal. Sanding creates a ton of dust. If you don’t get rid of it properly between grits, you’re basically just rubbing that dust into the wood. It’s like trying to clean a table with a dirty rag – you’re just moving the mess around. So, after each sanding pass, you’ve got to clean up. A good shop vac is your best friend here. Get into all the corners and crevices. Then, a tack cloth is perfect for picking up any super-fine particles that the vacuum missed. Seriously, don’t skip this step. It makes a world of difference when you get to the final finish.
Preparing For The Final Sealant
Once you’ve gone through all your grits and the floor looks like glass, you’re almost there. But before you slap on that varnish or oil, there’s one last check. Give the floor a really good wipe-down, maybe with a slightly damp cloth (make sure it’s not too wet, you don’t want to raise the grain too much). You’re looking for any last bits of dust or fuzz. Sometimes, after the final sanding, the wood can feel a little fuzzy. A light buff with a very fine grit (like 220 or even higher if you’re feeling fancy) can help, followed by another good clean. This prep work is what separates a good finish from a great one. It’s all about that smooth, clean surface ready to accept whatever sealant you choose.
You might think that once the sanding is done, the hard part is over. But the real magic happens in the details. Those little extra steps, like cleaning thoroughly and checking for fuzz, are what make your hardwood floor look like it belongs in a magazine. It’s the difference between ‘nice job’ and ‘wow, who did that?’
Beyond just the main sanding, other things can make your floors look amazing. Things like the type of finish you choose, how it’s applied, and even the little details can make a big difference. Want to learn more about making your floors shine? Visit our website today!
So, What’s the Takeaway?
Alright, so we’ve talked a lot about grit sizes and how they work their magic on UK hardwood. It’s not just about sanding; it’s about picking the right grit for the job. Start coarse, get finer, and you’ll see the difference. It’s like building something up, layer by layer. You don’t just slap paint on a wall, right? Same idea here. A little patience with your sandpaper goes a long way. You’ll end up with a finish that looks and feels amazing, and honestly, it’s pretty satisfying to know you did it yourself. Just remember to keep things clean between grits, and you’ll be golden. Happy sanding!
Frequently Asked Questions
Why do I need to use different sandpaper grits when sanding my wood floor?
Think of it like this: you start with a rougher sandpaper, kind of like a tough scrub brush, to get rid of the big stuff – dents, old finishes, or any major bumps. Then, you move to finer grits, which are like gentler cleaners, to smooth out the marks left by the coarser ones. It’s a step-by-step process to go from rough to super smooth, so you don’t end up with a bumpy or uneven finish.
What’s the deal with starting with a coarse grit? Won’t that damage the wood?
Actually, starting coarse is key for tough jobs! If your floor has deep scratches or old paint, a fine grit sandpaper just won’t cut it. A coarse grit is strong enough to tackle those problems quickly. The trick is to follow it up with progressively finer grits to erase any scratches the coarse one made. It’s all about making the job easier and faster.
How do I know when to switch to a finer grit sandpaper?
You’ll know it’s time to switch when the sandpaper you’re using isn’t really doing much anymore. If you’ve gone over the area a few times and it still looks rough or the same, it’s time for a finer grit. You should also switch if you start seeing a lot of dust instead of wood shavings. It means the sandpaper is worn out or you’re ready for the next step in smoothing.
Does the type of wood matter when picking sandpaper grits?
Definitely! Softer woods, like pine, can get damaged more easily by coarse grits. You might need to start with a slightly finer grit or be extra careful. Hardwoods, like oak or maple, can handle a bit more aggression from coarser grits. It’s good to know what kind of wood you’re working with so you don’t accidentally ruin it.
What happens if I skip a grit or go backward to a coarser grit?
Skipping a grit is like trying to jump steps – you’ll likely end up with a rougher surface than you wanted because the previous grit didn’t smooth out the marks well enough. Going backward to a coarser grit undoes all your hard work and reintroduces scratches that you’ll then have to fix all over again with finer grits. It’s a recipe for frustration and a less-than-perfect floor.
Besides the grit, what else affects how my floor turns out?
Lots of things! How you move the sander (your technique) makes a big difference – going with the wood grain is usually best. Keeping the dust down is super important too; a clean surface helps you see what you’re doing and prepares it better for the final finish. Even the quality of the sandpaper itself can impact how smoothly it cuts and how long it lasts.


