Transforming a worn-out wood floor into a stunning masterpiece requires more than just effort; it demands scientific precision. Have you ever thought about what goes into achieving that pristine finish? Sanding, while seemingly straightforward, is an art underpinned by science — particularly the progression of sandpaper grit. This process is the unsung hero in wood floor restoration, ensuring a smooth and refined surface ready for a new lease of life. Delve into the intricate world of sanding science and discover how expertly navigating grit progression can revolutionise your wood floors, enhancing your home’s aesthetics and value with Ryan’s Restoration.
Understanding Sanding Science for Wood Floor Restoration
Sanding science is crucial in wood floor restoration as it directly influences the quality and longevity of the floor’s finish. This process involves meticulously removing the top layer of a wooden floor to eliminate surface imperfections and prepare it for a new protective coating. By understanding the principles of sanding, such as the choice of grit and technique, one can achieve a flawless finish that enhances the natural beauty of the wood while prolonging its lifespan.
The floor sanding process requires specific tools to effectively manage different areas of the floor. A drum sander is essential for covering large, open spaces, efficiently removing old finishes and smoothing out any unevenness in the wood surface. For areas that a drum sander can’t reach, such as corners and edges, an edging sander is used to ensure a consistent finish across the entire floor. Additionally, a dust extractor is critical in maintaining cleanliness and air quality during sanding, as it removes the fine dust created in the process, preventing it from settling back onto the newly sanded surface.
Employing the correct sanding techniques is vital to achieving the desired outcome in floor restoration. This includes selecting the appropriate sandpaper grit, following the correct grit progression, and applying uniform pressure during sanding. These techniques not only ensure a smooth and even surface but also prevent common issues such as over-sanding or creating visible marks. Mastery of these techniques enables one to restore wood floors with precision, resulting in a durable and aesthetically pleasing finish.
The Role of Grit Progression in Achieving a Smooth Wood Floor Finish
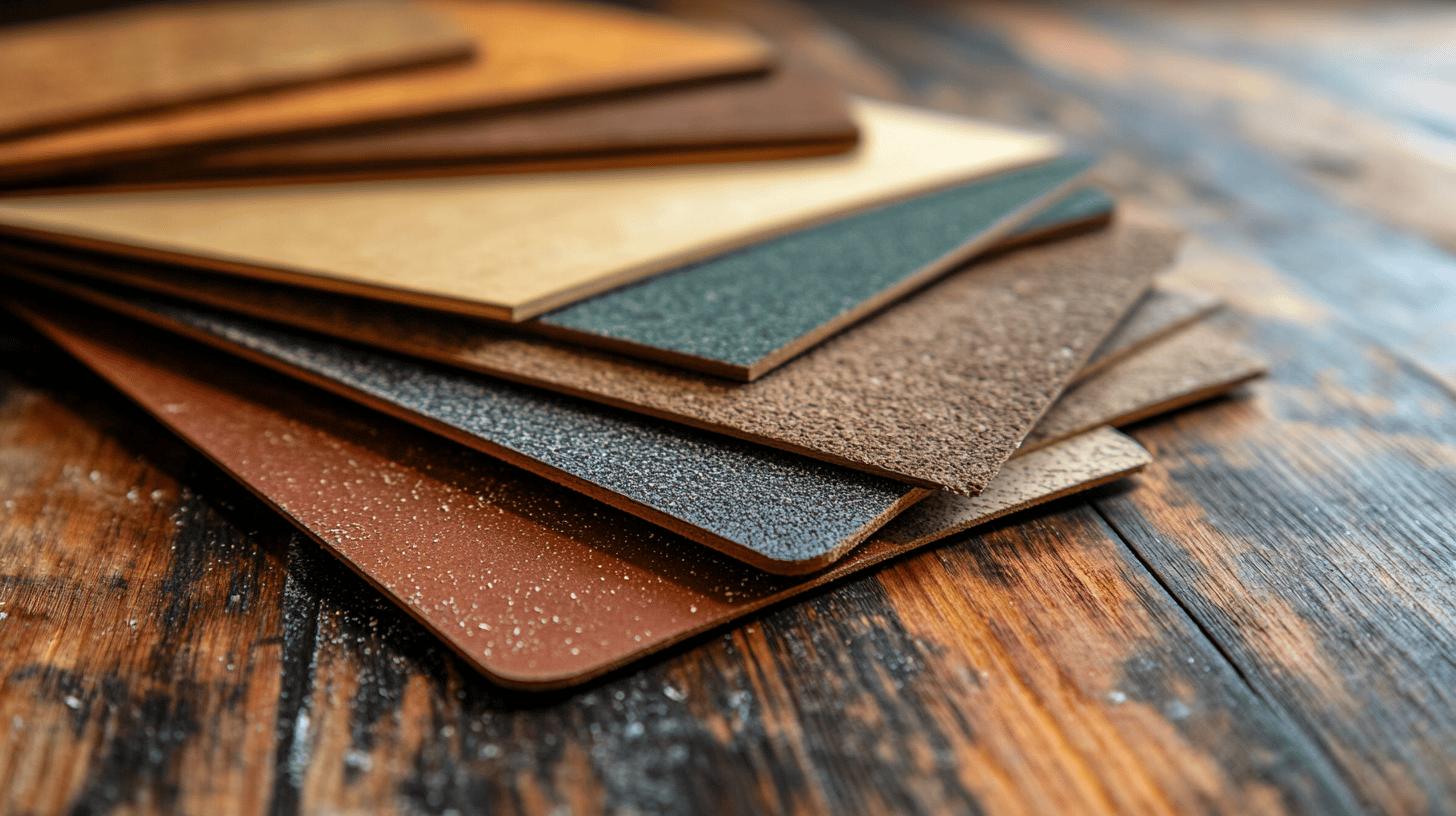
Grit progression is a fundamental concept in the sanding process, directly impacting the quality and smoothness of a wood floor finish. It refers to the systematic use of sandpaper grits, starting from coarse and moving to finer ones, to remove surface imperfections and prepare the wood for a new finish. The progression of grit ensures that each stage of sanding builds upon the previous one, effectively reducing scratches and creating a smooth, even surface. By understanding and applying the correct grit progression, the likelihood of achieving a professional-grade finish is significantly increased.
- Coarse Grit (36-40): Used for initial sanding to remove old finishes and level uneven surfaces.
- Medium Grit (60-80): Helps refine the surface by smoothing out the scratches left by coarse grits.
- Medium-Fine Grit (100-120): Further smooths the surface, preparing it for the final sanding stages.
- Fine Grit (150-180): Provides a smooth finish and readies the surface for sealing or staining.
- Extra Fine Grit (220): Used for a silky finish, ensuring the wood is optimally prepared for a new topcoat.
The use of coarse grits, such as 36-40, is the initial step in the sanding process, essential for removing any existing finishes and leveling out the wood surface. This stage is crucial for addressing any significant unevenness or deep scratches and setting a solid foundation for subsequent sanding. Following this, medium grits (60-80) are employed to smooth out the roughness left by the coarse grit. They work effectively to eliminate visible scratches and begin refining the wood surface, transitioning it to a more uniform appearance.
The final stages of grit progression involve using fine and extra fine grits to achieve the desired wood surface smoothness. Medium-fine grits (100-120) and fine grits (150-180) further refine the wood, smoothing out any remaining imperfections and ensuring the surface is even. The use of extra fine grit (220) is the last step, providing a silky finish that prepares the wood for sealing or staining. This meticulous progression not only enhances the aesthetic appeal of the floor but also ensures a durable and long-lasting finish, highlighting the importance of correct grit sequence in floor restoration.
Selecting the Right Grit for Specific Floor Conditions
Choosing the correct sandpaper grit is crucial for effective surface preparation, as it directly impacts both the removal of old coatings and the smoothness of the final finish. Factors influencing grit selection include the floor’s current condition, the type of wood, and the extent of wear or damage. For instance, heavily worn or uneven floors may require coarser grits to remove old finishes and level the surface effectively. Conversely, floors in better condition may only need finer grits for minor smoothing and preparation. Understanding these factors helps in selecting the optimal grit for each specific floor condition, ensuring a balance between efficient material removal and achieving a smooth finish.
To ensure the best outcomes, it is vital to use selected grits optimally during the sanding process. Begin with the recommended grit for your floor’s condition, gradually progressing to finer grits to achieve the desired smoothness. This progression reduces the risk of sanding marks and uneven surfaces, enhancing the wood’s natural beauty. Applying consistent pressure and following the wood grain during sanding are also essential practices. These techniques, combined with the appropriate grit selection, contribute to a professional and durable finish that restores the floor’s appearance and prolongs its lifespan.
Common Sanding Mistakes and How to Avoid Them
Errors in the sanding process can significantly impact the quality of wood floor restoration, leading to an unsatisfactory finish and potential long-term damage. Over-sanding is a prevalent mistake, as it can thin the wood excessively, reducing its lifespan. Uneven surfaces may result from inconsistent pressure or improper equipment handling, affecting the floor’s aesthetic appeal. Sanding marks, often caused by incorrect grit usage or technique, can mar the surface, while poor dust management can lead to debris settling back onto the floor, impacting the final finish. Addressing these mistakes with correct sanding practices ensures a smooth, durable, and visually pleasing outcome.
- Over-sanding: Avoid using the correct grit and monitoring pressure.
- Uneven surfaces: Ensure even pressure and proper equipment handling.
- Sanding marks: Use appropriate grit progression and technique.
- Poor dust management: Employ dust extractors to maintain cleanliness.
Advanced Sanding Techniques and Tools
Advanced sanding techniques are imperative for achieving superior finishes in wood floor restoration. These techniques go beyond basic sanding, incorporating a detailed understanding of the wood’s characteristics and the systematic application of grit progression. By employing advanced methods, such as precise pressure application and strategic grit usage, one can enhance the floor’s aesthetic appeal and durability, ensuring a professional-grade outcome.
Modern sanding tools have revolutionised the floor restoration process, providing enhanced control and efficiency. Detail sanders are invaluable for working on intricate areas, such as corners and edges, where larger tools cannot reach. These sanders allow for precise work without compromising the overall finish. Additionally, tools like random orbital sanders are crucial for intermediate and fine sanding stages, offering versatility and reducing the risk of sanding marks. Dust extractors play a vital role in maintaining a clean work environment, preventing dust from resettling and ensuring a pristine finish. These advancements in sanding technology make the process more efficient and the results more consistent.
Implementing advanced sanding techniques requires both knowledge and skill. Begin by selecting the appropriate tools for each stage of sanding, ensuring compatibility with the floor’s condition and the desired finish. Employ a systematic approach, starting with rough sanding to remove old finishes, followed by intermediate sanding for surface refinement, and concluding with fine sanding for a silky smooth finish. Applying consistent pressure and following the wood grain are essential practices to avoid common mistakes such as over-sanding or creating uneven surfaces. Mastery of these techniques, combined with the right tools, guarantees a flawless and enduring restoration of wood floors.
Sanding Safety and Maintenance Tips
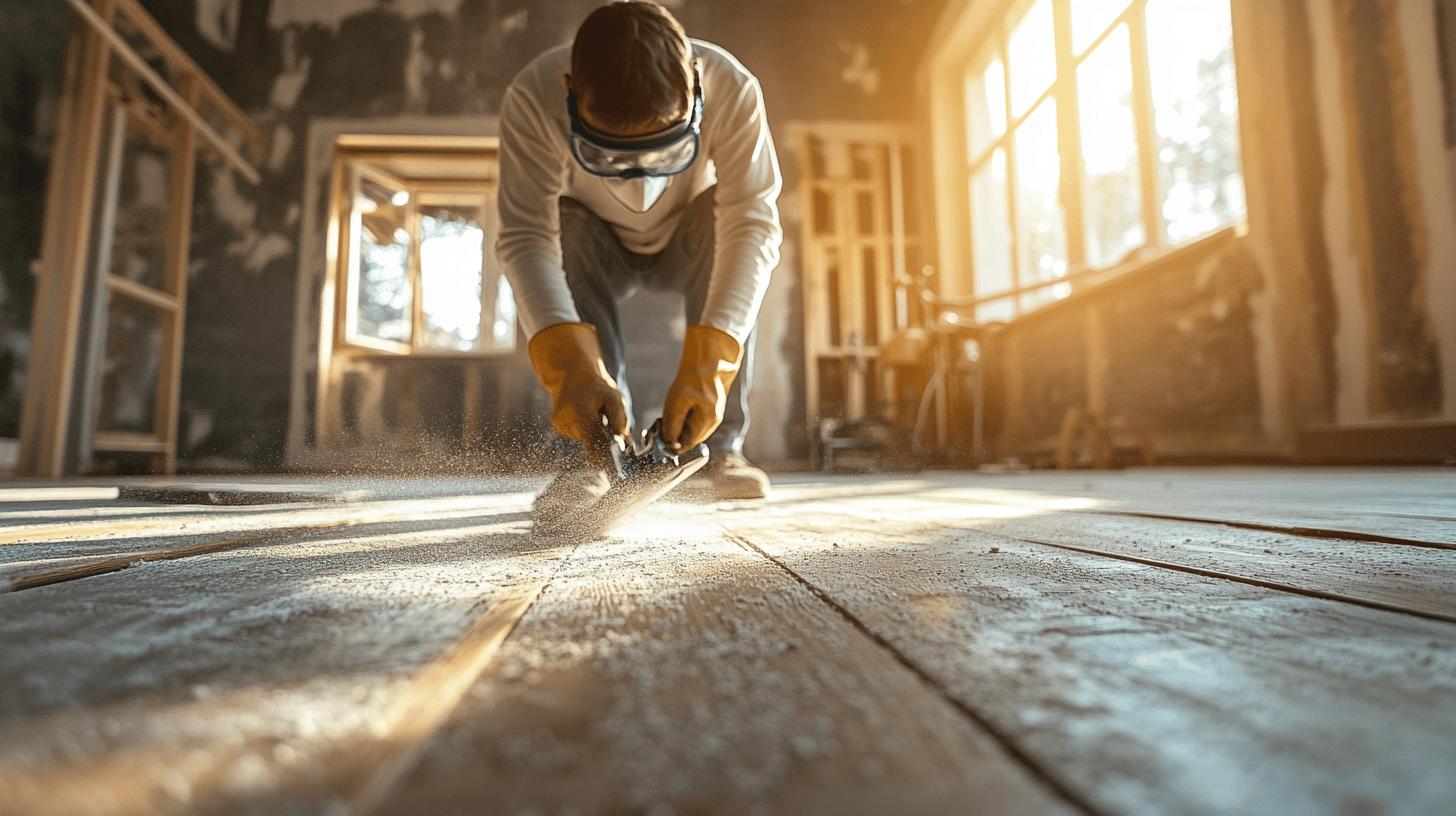
Ensuring safety during the sanding process is paramount to achieving effective results while protecting both the user and the environment. A critical first step involves clearing the workspace of all furniture and debris, creating a hazard-free area to operate in. Using personal protective equipment, such as safety goggles and dust masks, is essential to shield against airborne particles and potential injuries. Adequate ventilation is also crucial, as it helps disperse dust and fumes, maintaining air quality. These precautionary measures not only safeguard health but also contribute to a more efficient sanding process.
- Sweep or vacuum regularly to prevent dirt accumulation.
- Use protective pads under furniture to avoid scratches.
- Address minor repairs promptly to prevent further damage.
- Apply a suitable finish to protect and enhance the wood’s appearance.
- Control humidity levels to prevent wood expansion or contraction.
Regular maintenance is vital for preserving the quality and appearance of wood floors. Consistent sweeping or vacuuming removes dirt and debris, preventing scratches and surface wear. Implementing protective measures, such as using pads under furniture, helps reduce the risk of damage. Promptly attending to minor repairs, like filling small dents or scratches, ensures they do not develop into more significant issues. Applying a protective finish enhances the wood’s visual appeal and durability. Moreover, controlling indoor humidity levels prevents wood expansion or contraction, further extending the floor’s lifespan. These practices collectively maintain the floor’s integrity and aesthetic, ensuring its longevity and performance.
Final Words
Mastering the science of sanding, particularly grit progression, is crucial for successful wood floor restoration. Utilising the right tools and understanding the role each grit plays in smoothing the wood surface ensures a high-quality finish. Avoiding common sanding errors enhances the restoration process and prepares homeowners for advanced techniques that elevate the floor’s aesthetic appeal.
A strong grasp of sanding safety and maintenance can sustain floor beauty, allowing Ryan’s Restoration to deliver impeccable standards. Embracing these practices, one can appreciate the transformative role of “The Science of Sanding: How Grit Progression Affects Wood Floor Restoration”.
FAQ
What is the grit progression for sanding hardwood floors?
The grit progression for sanding hardwood floors involves starting with coarse grits (36-40) for initial sanding. Medium grits (80-120) smooth the surface, and fine grits (150-220) provide a silky finish.
What is the sanding progression for wood?
Sanding progression for wood typically begins with coarse grits to remove imperfections, followed by medium grits for smoothing, and concludes with fine grits to achieve a polished finish.
Why does sandpaper need to use in-sequence grit during the sanding process?
Sandpaper must use in-sequence grit to gradually refine the wood surface, ensuring imperfections are effectively removed while achieving a smooth and uniform finish.
How many times can you sand and refinish hardwood floors?
Hardwood floors can be sanded and refinished approximately 6-7 times for solid wood and 4 times for engineered wood planks, depending on the board thickness.


