
So, you’ve got a cool old building and you’re turning it into flats. That’s awesome! But wait, what about noise? Especially with wood floors, sound can travel like crazy. We’re going to chat about how to deal with Part E Building Regs, specifically when you’re thinking about floor sanding and making sure your place doesn’t sound like a bowling alley for your neighbors. It’s not as scary as it sounds, promise.
Key Takeaways
- Part E of the Building Regs is all about stopping sound from traveling between rooms and flats. It’s a big deal, especially in places like converted flats.
- Wood floors can be tricky for sound. Sanding them is great for looks, but it doesn’t automatically make them quiet. You need to think about soundproofing too.
- You can’t just sand and hope for the best when it comes to floor sanding soundproofing regulations. You need to add materials that block sound, like special underlays or mats.
- Impact noise (like footsteps) and airborne noise (like talking) are different. You often need different fixes for each, and sometimes a mix of solutions works best.
- If you’re doing a conversion, check the rules carefully. It’s often a good idea to get someone who knows about these regulations to check your work before you finish up.
Understanding Part E Building Regulations
What Are Part E Regulations All About?
So, you’re thinking about converting a house into flats, or maybe you’ve got a new block of flats going up? You’re going to bump into something called Part E of the Building Regulations. Basically, it’s all about making sure people living in attached or separate dwellings can’t hear each other too much. It’s about peace and quiet, really. Think about it – nobody wants to hear their neighbor’s TV blaring at midnight or their toddler’s footsteps stomping around all day. Part E sets out the rules for sound insulation, making sure new homes and converted homes meet a certain standard so you don’t end up with a noisy nightmare. It covers both airborne sound (like voices and music) and impact sound (like footsteps and dropped items).
Why Sound Insulation Matters in Flats
Living in close quarters, like in flats, means sound travels easily. Walls, floors, and ceilings become shared surfaces, and without proper soundproofing, your living space can quickly become someone else’s annoyance. It’s not just about being a good neighbor, though that’s a big part of it. Good sound insulation actually makes properties more desirable and can even add to their value. Nobody enjoys feeling like they’re living in a drum. Plus, it’s a legal requirement, so getting it wrong can lead to a whole heap of trouble down the line, like having to rip things out and start again. That’s a headache nobody needs.
Key Requirements for New Builds vs. Conversions
Part E has slightly different rules depending on whether you’re building from scratch or converting an existing building. For new builds, the standards are generally a bit stricter because you’re designing everything from the ground up. You can build in the soundproofing from the start. Conversions, however, can be trickier. You’re often working with existing structures, which might not be ideal for soundproofing. The regulations acknowledge this, but they still require you to take reasonable steps to improve sound insulation. This usually means adding soundproofing layers to floors, walls, and ceilings. The goal is to achieve a minimum level of sound reduction, and the specific targets can be found in the official Approved Document E. It’s a bit of a balancing act between what’s practical and what the law demands.
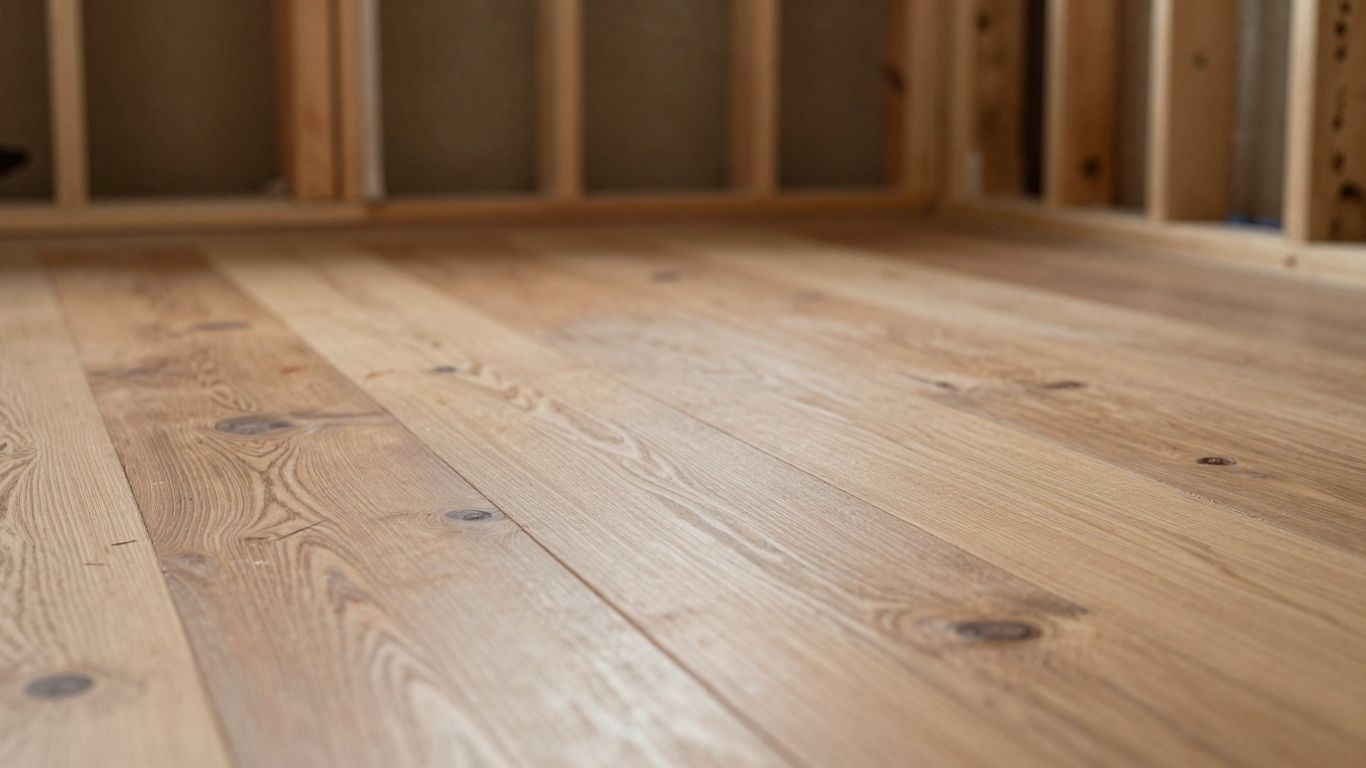
Soundproofing Your Wood Floors: The Basics
So, you’ve got these beautiful wood floors, maybe they’re original to the place or you’ve just put them in. They look great, right? But when you’re dealing with flats, especially converted ones, sound is a whole different ballgame. We’re not just talking about your own footsteps; it’s about what your neighbors can hear and what you can hear from them. It’s a bit of a headache, but understanding how sound moves is the first step to fixing it.
How Sound Travels Through Floors
Sound is basically vibrations, and these vibrations love to travel. When it comes to floors, sound can go two main ways: through the air and through the structure itself. Airborne sound is like voices, music, or the TV. It hits the floor, and the floorboards vibrate, sending that sound down to the room below. Impact sound is a bit more direct – think of someone walking, dropping something, or even a chair scraping. These actions send vibrations straight into the floor structure, and again, it all travels.
- Airborne Sound: Travels through the air and makes the floor vibrate.
- Impact Sound: Direct vibrations from physical contact.
- Flanking Sound: Sound that travels around the main floor structure, through walls or other connected elements.
Common Soundproofing Myths Debunked
There are a lot of ideas out there about soundproofing that just don’t hold up. For instance, some people think that just laying down a thick rug will do the trick. While a rug can help a little with impact noise, it’s not going to stop voices or music from coming through. Another myth is that filling cavities with insulation is all you need. That’s part of it, sure, but it’s not the whole story. You need a system that addresses both airborne and impact sound.
Don’t just slap on a thick carpet and call it a day. Real soundproofing is about creating barriers and adding mass, not just covering things up.
The Role of Floor Sanding in Soundproofing
Now, you might be wondering, “What does sanding my wood floors have to do with soundproofing?” Well, on its own, sanding doesn’t really add soundproofing. In fact, it can sometimes make things worse if the floorboards are loose or there are gaps. However, sanding is often a necessary step before you can properly install soundproofing materials. You need a clean, flat surface to work with. If you’re planning to add soundproofing layers, sanding is usually the prep work that comes before the real sound-blocking magic happens. It’s about getting the existing floor ready for whatever you’re going to add on top to meet those Part E regs.
Achieving Compliant Floor Sanding Soundproofing
Choosing the Right Soundproofing Materials
So, you’ve got your wood floors looking all spiffy after a good sanding, but now we need to think about the noise. Part E regs are all about keeping sound from traveling between flats, and your floor is a big player in that. When we talk about soundproofing, it’s not just about slapping some carpet down. We’re looking at specific materials designed to block sound. Think about things like acoustic underlayment – these are specially made mats that go under your flooring. They’re not your average foam padding; they’re engineered to absorb and block sound waves.
Another big one is mass-loaded vinyl (MLV). This stuff is heavy and dense, and adding it to your floor structure can make a real difference in stopping sound in its tracks. It’s like adding a thick blanket to your floor, but way more effective.
Here are some common materials you’ll see:
- Acoustic Underlayment: Comes in rolls or mats, designed to sit directly beneath your wood floor. Different thicknesses offer different levels of sound reduction.
- Mass-Loaded Vinyl (MLV): A heavy, flexible barrier that adds mass to the floor structure. Often used in conjunction with other materials.
- Resilient Channels: Metal strips that help decouple the ceiling from the joists, reducing vibration transfer. More common for ceilings, but the principle applies to floor structures too.
- Soundproofing Insulation: Dense insulation materials that can be fitted between floor joists to absorb airborne sound.
The goal is to add mass and create decoupling to stop vibrations.
Installation Techniques for Maximum Impact
Just having the right materials isn’t enough; how you put them in matters a ton. It’s like baking a cake – follow the recipe, or it won’t turn out right. For soundproofing, this means paying attention to details. You want to make sure there are no gaps or weak spots where sound can sneak through.
Think about sealing everything up tight. Any little crack can let sound pass. This often means using acoustic sealant around the edges of your floor and where pipes or wires come through. It’s a bit like caulking around a bathtub, but for sound.
Here’s a quick rundown of what to focus on:
- Proper Underlayment Placement: Make sure the acoustic underlayment is laid flat and covers the entire subfloor without any overlaps that could create an uneven surface or sound bridges.
- Sealing Gaps: Use acoustic sealant to fill any gaps between the subfloor, walls, and any penetrations (like pipes or electrical boxes). This is super important.
- Layering: If you’re using multiple soundproofing layers, like MLV and underlayment, ensure they are installed correctly according to the manufacturer’s instructions. Sometimes, specific order or adhesion methods are needed.
- Edge Detailing: Pay close attention to how the flooring meets the walls. There should be a slight gap filled with a soft material or sealant to prevent direct contact that transmits sound.
Don’t underestimate the power of a good seal. Sound is sneaky and will find any little opening to travel through. Taking the time to seal up all the edges and penetrations is often the difference between a compliant floor and one that’s not.
The Importance of a Professional Approach
Look, I get it. DIY is tempting, especially when you’ve just spent a bunch on sanding. But when it comes to building regulations like Part E, messing up can mean costly fixes down the line. Professionals know the ins and outs of these rules. They’ve got the experience to know which materials work best for your specific floor structure and how to install them so they actually do their job.
They also have access to specialised tools and products that might not be readily available to the average homeowner. Plus, they can often provide a warranty on their work, which is a nice bit of peace of mind.
Here’s why calling in the pros makes sense:
- Knowledge of Regulations: They stay up-to-date with Part E requirements and know exactly what’s needed to pass inspection.
- Material Selection: They can recommend the most effective and cost-efficient soundproofing materials for your situation.
- Proper Installation: They have the skills and experience to install everything correctly, avoiding common mistakes that reduce effectiveness.
- Documentation: Often, professional work comes with documentation that can be helpful when dealing with building control inspectors.
Hiring a professional soundproofing installer can save you time, money, and a whole lot of headaches in the long run. It’s an investment in getting it right the first time.
Addressing Impact and Airborne Sound
Okay, so we’ve talked about Part E regs and why soundproofing matters. Now, let’s get down to the nitty-gritty of what kind of noise we’re actually dealing with when it comes to floors in converted flats. It’s not just one type of sound, you see. There are two main culprits: impact sound and airborne sound.
Tackling Footsteps and Dropped Objects
This is what we call impact sound. Think about it – someone walking upstairs, their heels clicking on the wood, or maybe they drop something. That thud or clatter travels right through the structure of the building. It’s pretty annoying, right? Especially when you’re trying to relax.
- Heavy Footfalls: The heavier the person, the more impact.
- Hard-Soled Shoes: These make a lot more noise than slippers.
- Dropped Items: Anything from a toy to a set of keys can create a sharp, loud noise.
When you’re sanding and restoring a wood floor, you’re not really adding soundproofing here. The floor itself is the source of the impact. The soundproofing needs to happen underneath or within the floor structure to stop that vibration from getting to the flat below.
The goal with impact sound is to absorb or block the vibrations before they can travel through the building’s structure. It’s like putting a cushion between the source of the noise and the next room.
Minimising Voices and Music Transmission
This is the other big one: airborne sound. This is the sound that travels through the air, like voices, music, or TV noise. It can sneak through gaps, cracks, and even thin floorboards. If you’ve ever heard your neighbour’s TV through the ceiling, that’s airborne sound at play.
- Speech: Even quiet conversations can be heard if the insulation isn’t up to par.
- Music: Bass frequencies are particularly tricky and can travel easily.
- TV/Radio: The range of sounds from these can be quite varied.
With airborne sound, it’s all about creating a barrier that sound waves can’t easily pass through. This often involves adding mass and density to the floor structure.
Combined Solutions for Comprehensive Soundproofing
Honestly, most of the time, you’re going to need to deal with both types of sound. A good soundproofing job tackles both impact and airborne noise. This usually means a multi-layered approach. You might have a resilient layer to deal with impact, and then dense materials to block airborne sound.
Here’s a quick rundown of what a combined solution might look like:
- Underlayment: A good quality acoustic underlay is key for impact sound.
- Mass Loaded Vinyl (MLV): This heavy, flexible material is great for blocking airborne sound.
- Acoustic Insulation: Filling cavities with mineral wool or similar can help absorb sound.
- New Floorboards/Screeding: Sometimes, adding a new layer on top is necessary.
The trick is to create a system that interrupts the path sound takes, whether it’s through vibration or through the air. It’s not just about slapping some foam down; it’s about understanding how sound moves and blocking it at every opportunity.
When Floor Sanding Meets Soundproofing Regulations
Navigating the Regulations for Conversions
So, you’ve got a cool old building, and you’re turning it into a few flats. Awesome! But here’s the thing: when you convert a place, the rules for soundproofing get a bit more specific. It’s not just about making it look pretty with that freshly sanded wood floor; you’ve got to make sure your neighbors aren’t hearing every single footstep or conversation from upstairs. Part E of the Building Regulations is all about making sure flats are reasonably quiet between each other. For conversions, they’ve laid out specific targets you need to hit, and your floor is a big part of that puzzle.
Ensuring Your Sanding Project Meets Standards
When you’re sanding down those old floorboards, you’re not just prepping them for a new finish. You’re also looking at how to make them quieter. This usually means adding a layer of soundproofing underneath the floorboards before they go back down, or sometimes, adding a secondary floor on top. Think of it like adding a good rug to a hard floor – it helps a bit, but for regulations, you need something more substantial. The key is to reduce both impact sound (like shoes on the floor) and airborne sound (like voices and music).
Here’s a quick rundown of what you’re generally aiming for:
- Impact Sound: This is all about how much noise travels down through the floor. Think of someone walking, dropping something, or kids jumping. You want to dampen this.
- Airborne Sound: This is noise that travels through the air and then through the floor structure. Voices, TV, music – that sort of thing. You need to block this.
Working with Approved Inspectors
Don’t try to guess if you’re meeting the standards. The best way to go is to get an approved inspector involved early on. They know exactly what the Part E regulations require for conversions. They can tell you what kind of soundproofing system you need to install under your wood floor to pass the tests. It might involve specific types of acoustic underlay, resilient bars, or even a floating floor system. Getting this right the first time saves a lot of hassle and potential costs down the line. They’ll likely want to see the plans and potentially do tests once the work is done to sign it off. It’s better to be safe than sorry, especially when it comes to keeping your new flat owners happy and the regulators off your back.
Common Challenges and Solutions
Dealing with Existing Floor Structures
So, you’ve got these old floorboards, right? They might look charming, but they can be a real headache when you’re trying to get them up to snuff with Part E regs. Sometimes, the joists are a bit wonky, or maybe there’s just not much space to add extra soundproofing layers. The biggest hurdle is often working with what’s already there. You can’t just rip everything out and start fresh in most conversions. We’ve seen floors where the original timber was just too thin, or the gaps between the joists were massive, letting sound just zip through. It’s like trying to build a quiet room in a sieve.
Here’s a quick rundown of what we often run into:
- Uneven Joists: Makes it tough to get a flat, stable base for new layers.
- Low Ceiling Heights: Adding mass or insulation can eat up precious headroom.
- Structural Weaknesses: Sometimes the old floor just isn’t strong enough to take more weight.
- Hidden Obstructions: Old pipes, wiring, or even just debris can get in the way.
Budget-Friendly Soundproofing Options
Let’s be real, soundproofing can get pricey. But you don’t always need the most expensive stuff to make a difference. Sometimes, it’s about smart choices. For instance, using dense materials like acoustic plasterboard or mineral wool can be pretty effective without breaking the bank. You can also look at resilient channels or acoustic battens; they help decouple the new floor finish from the existing structure, which is a big win for stopping vibrations. It’s not always about adding tons of mass, but about breaking the sound’s path.
Think about these options:
- Dense Underlayments: Some specialised underlays offer decent sound reduction for a reasonable cost.
- Layering Plasterboard: Adding an extra layer of acoustic plasterboard can make a noticeable impact.
- Sealing Gaps: Often overlooked, but sealing up any cracks or holes with acoustic sealant is super cheap and effective.
Sometimes, the simplest solutions are the most overlooked. A good seal around the edges of the room, where the floor meets the walls, can stop a surprising amount of noise from traveling. Don’t forget those little gaps!
Maintaining the Aesthetic of Your Wood Floors
This is where it gets tricky. You want soundproofing, but you also want those gorgeous original wood floors to shine, right? Nobody wants to cover up beautiful timber with a load of carpet or vinyl if they don’t have to. The good news is, you can often achieve compliance while keeping your wood floors. It usually involves adding soundproofing layers underneath the finished wood floor. This might mean installing a floating floor system, where the new wood floor sits on top of an acoustic underlayment and possibly some damping material, all isolated from the original structure. It takes a bit more planning, but the result is a floor that’s both quiet and looks fantastic. The key is to find materials that work well acoustically but can still be finished with your chosen wood. It’s all about finding that sweet spot between performance and looks. You might even find that a well-installed, dense wood floor itself offers some inherent sound dampening qualities, especially when paired with the right subfloor and underlayment.
Facing common problems with your floors? Don’t worry, we’ve got you covered. Many issues can be fixed with the right approach. Visit our website to learn more about how we can help you.
So, What’s the Takeaway?
Alright, so we’ve talked about making those old wood floors look great again and how that ties into Part E of the building regs, especially when you’re turning a house into flats. It can seem like a lot, right? You want your floors to be beautiful, but you also gotta make sure the soundproofing is up to snuff. The good news is, it’s totally doable. You just need to be smart about it. Think about the materials you’re using and how they’ll work together. Sometimes, a bit of extra effort upfront saves you a headache later. Don’t be afraid to ask for advice if you’re unsure. Getting this right means happy neighbors and a place that feels like a proper home, not just a box. Plus, a nicely restored floor? That’s just a win all around.
Frequently Asked Questions
So, what’s the big deal with Part E building rules?
Basically, Part E is all about making sure flats are quiet enough. When you convert a house into separate apartments, you’ve gotta make sure people upstairs can’t hear every little thing happening below, and vice-versa. It’s about stopping noise from driving people bonkers!
Does sanding my wood floors actually help with noise?
Sanding itself doesn’t really make things quieter. It’s more about getting the floor ready. The real soundproofing magic happens when you add special materials *before* or *after* sanding, like thick underlays or mats. Sanding just makes it look pretty again!
What’s the difference between impact noise and airborne noise?
Think of impact noise as thumps and bumps – like someone walking around in heels or dropping something heavy. Airborne noise is more like voices, music, or the TV. They travel differently, so you often need different tricks to block them.
Can I just slap some carpet underlay down and call it a day?
Nope, not usually. While some underlays can help a little, meeting the official rules, especially for conversions, needs more serious stuff. You’ll likely need special soundproofing materials designed to really cut down on noise, not just muffle it a bit.
Do I really need a pro to soundproof my floors?
It’s a really good idea! Getting soundproofing right can be tricky. Professionals know which materials work best for your specific floor and what the rules actually demand. Doing it wrong means you might have to redo it, which costs more time and money.
What if my old floor is all wonky and weird?
Don’t sweat it! Even with older, uneven floors, there are ways to soundproof. Sometimes you might need to level things out first, or use flexible soundproofing materials that can adapt. A good installer will figure out the best plan for your unique situation.


