So, you’ve got a wood floor that needs a little TLC. Maybe a scratch here, a loose board there. It’s tempting to just grab some wood glue and call it a day, right? But hold on a second. There’s a whole set of rules, called British Standards, that really matter when you’re fixing up your wood floors. Specifically, BS 8201:2011. Ignoring this could lead to more headaches down the road. Let’s chat about why these standards are a big deal for your british standards wood flooring.
Key Takeaways
- British Standards, like BS 8201:2011, are guidelines for good practice in wood flooring. They’re not just suggestions; they help make sure things are done right.
- Fixing your wood floor isn’t just about looks. Doing it the right way keeps it strong and stops problems from popping up later.
- BS 8201:2011 gives pointers on the best stuff to use, how to put it in, and how to look after it so your floor lasts.
- Sometimes, wood floor problems are tricky. It’s smart to get someone who really knows their stuff, especially if they’re certified.
- Following these standards protects your floor, keeps your home looking good, and gives you peace of mind that the job was done properly.
Understanding the Basics of British Standards Wood Flooring
What Are British Standards?
So, what exactly are British Standards? Think of them as a set of guidelines or rules that pretty much everyone agrees on for how things should be done, especially when it comes to building and materials. They’re developed by experts in different fields to make sure products and services are safe, reliable, and work the way they’re supposed to. It’s all about setting a benchmark for quality.
Why Standards Matter for Wood Floors
When it comes to wood floors, standards are a big deal. They cover everything from the type of wood used, how it’s dried, and even how it should be installed. Following these standards means your floor will look good, last a long time, and won’t cause problems down the road. It’s not just about making it look pretty; it’s about making sure it’s built right from the ground up.
The Role of BS 8201:2011
This is where BS 8201:2011 comes into play. It’s a specific British Standard that focuses on wood flooring, including how to install and repair it. It gives clear instructions on things like:
- Choosing the right materials for the job.
- Proper installation methods to avoid issues like warping or squeaking.
- Advice on finishing and how to look after your floor.
Basically, it’s the go-to guide for anyone working with wood floors, especially if you want the job done right and to last. It helps make sure that whether you’re laying a new floor or fixing an old one, you’re following best practices.
The Importance of Proper Wood Floor Repair
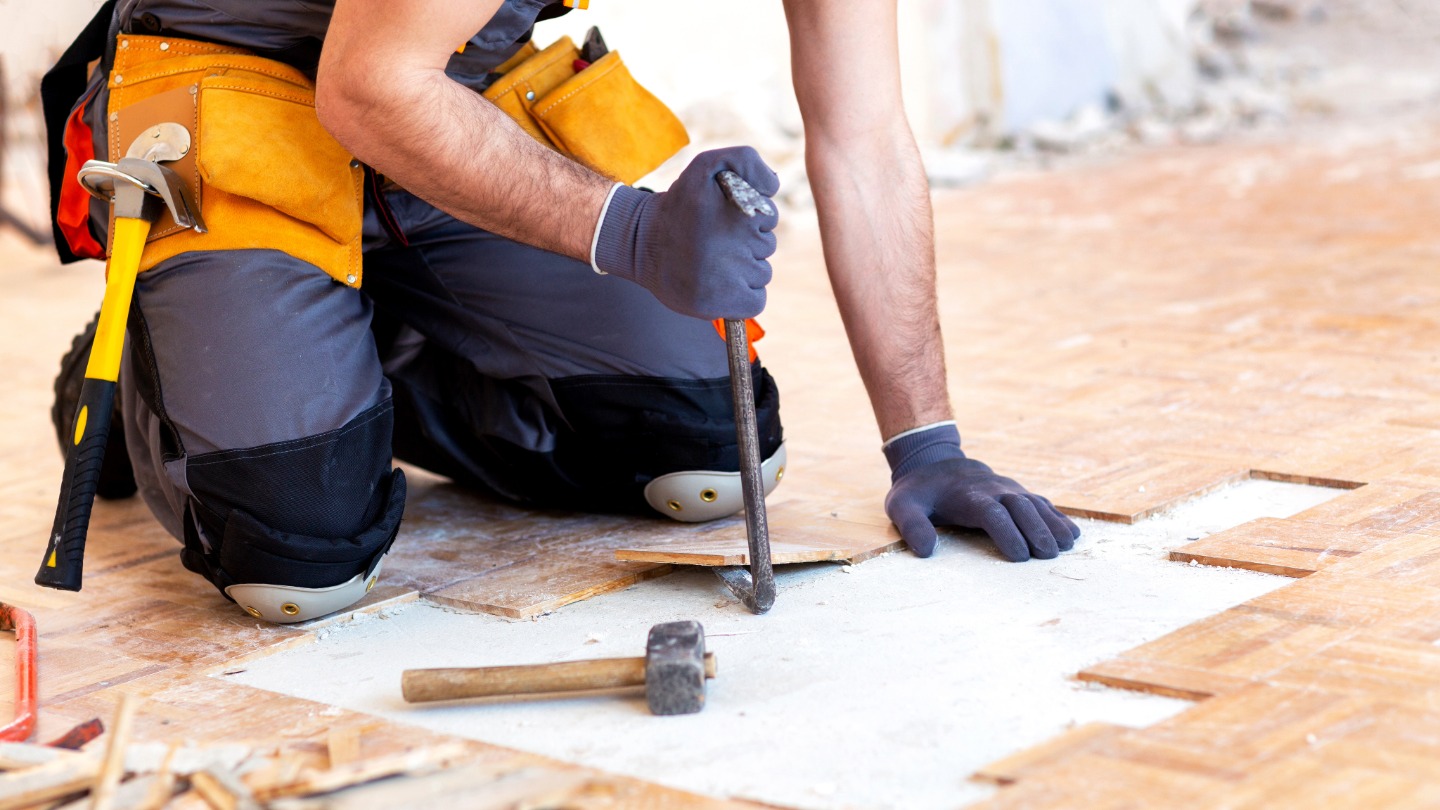
So, your wood floor has seen better days. Maybe it’s a scratch here, a dent there, or perhaps a whole section looks a bit sad. It’s easy to think, ‘Eh, it’s just a floor, right?’ But honestly, how you fix it makes a big difference. Getting wood floor repairs done right isn’t just about making things look pretty again. It’s about keeping your floor around for the long haul and avoiding bigger headaches down the road.
Beyond Just Aesthetics
Sure, nobody wants a floor that looks like it lost a fight with a pack of wild dogs. A good repair job makes your space look sharp. But it’s more than just surface-level stuff. When you fix a problem properly, you stop it from getting worse. A small crack can let in moisture, which can lead to warping or even rot. Fixing that scratch means you’re not just hiding it; you’re protecting the wood underneath.
Ensuring Longevity and Durability
Think of your wood floor as an investment. You want it to last, right? Using the wrong materials or techniques for a repair can actually weaken the floor. It might look okay for a bit, but under normal foot traffic, those shoddy repairs can fail. This means you’ll be back fixing it again, possibly with more damage this time. Proper repair, following guidelines like BS 8201:2011, means using the right stuff and doing it the right way, so your floor stays strong and looks good for years.
Preventing Future Problems
This is where things get really practical. A poorly repaired section can create a tripping hazard. Water can seep into gaps, causing damage to the subfloor or even your ceiling below if it’s on an upper level. Plus, if you ever decide to sell your place, a floor that’s falling apart or has obvious, bad repairs is a major red flag for potential buyers. Doing it right the first time saves you from these kinds of future headaches and keeps your home in good shape.
Fixing wood floors isn’t just about patching up damage. It’s about maintaining the integrity of the entire floor system. When you cut corners, you’re not just saving a few bucks now; you’re likely setting yourself up for more expensive and complicated issues later on. It’s about respecting the material and the structure it’s part of.
Here’s a quick look at what can go wrong:
- Using the wrong type of wood filler: Some fillers shrink, crack, or don’t take stain well, making the repair obvious and weak.
- Improper sanding: Sanding too deep or unevenly can create dips and low spots that are noticeable and can wear out faster.
- Bad finishing: Not matching the finish or applying it poorly leaves the repaired area looking out of place and offers less protection.
- Ignoring moisture issues: Trying to fix a surface problem without addressing the underlying dampness is a recipe for disaster.
Key Aspects of BS 8201:2011 for Repairs
Alright, so you’ve got a bit of a situation with your wood floor, and you’re thinking about fixing it up. BS 8201:2011 isn’t just some dusty old rulebook; it actually has some really practical stuff in it that can save you a headache down the line, especially when it comes to repairs. It’s all about making sure the job is done right, so your floor looks good and lasts.
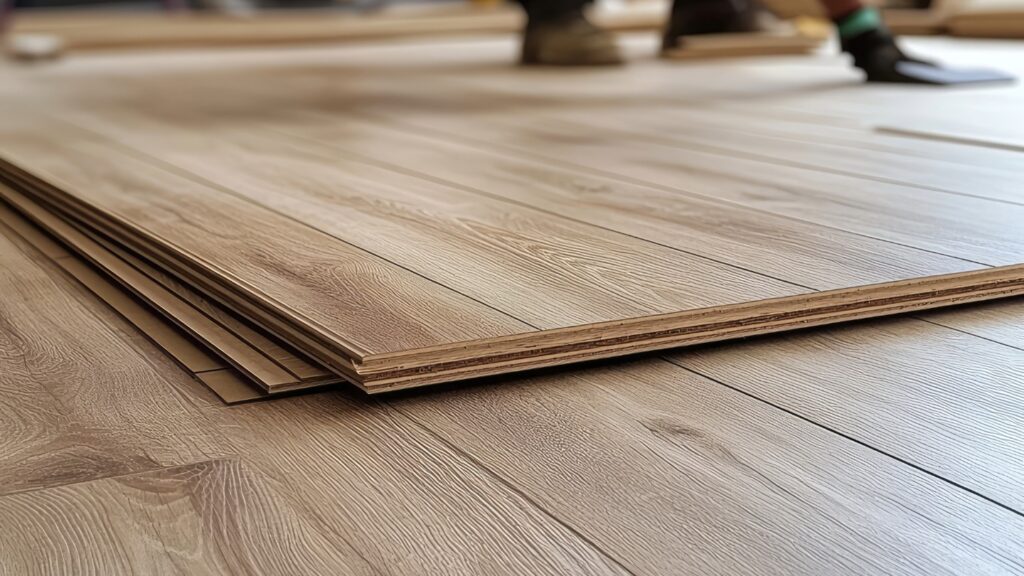
Material Selection Guidance
This is a big one. The standard gives you a heads-up on what kind of wood to use for repairs. You can’t just grab any old plank from the shed. BS 8201:2011 talks about matching the species, grade, and moisture content of the wood you’re using for the repair to the existing floor. Getting this right means the new bits won’t swell or shrink differently than the rest of your floor, which is a common cause of problems. It’s about making sure the repair blends in, not just visually, but structurally too.
Installation Techniques
How you actually put the new wood in matters. The standard covers things like how to properly prepare the subfloor, how to fix the new boards (nails, glue, or both?), and how to make sure they’re level with the existing floor. It’s not just about hammering things in place. It’s about a solid connection that won’t come loose. Think about it: a poorly fitted board can lead to squeaks, gaps, and even tripping hazards.
Finishing and Maintenance Advice
Once the repair is in, you’re not done. BS 8201:2011 also touches on how to finish the repaired area so it matches the rest of your floor. This includes advice on sanding and applying finishes like oils or lacquers. It also gives pointers on how to look after your floor after the repair to keep it in good shape. Regular cleaning and avoiding too much moisture are key, and the standard helps you understand what that looks like for a repaired floor.
Following the guidelines in BS 8201:2011 for repairs isn’t just about ticking boxes. It’s about making sure the fix is sound, looks good, and won’t cause more trouble later. It’s the difference between a quick patch-up job and a repair that actually lasts.
When to Call in the Experts
Look, sometimes you just know when a job is bigger than you. Maybe you’ve got a wobbly floorboard that’s more than just loose, or perhaps a patch of water damage that’s spread further than you initially thought. It’s smart to recognise when your DIY skills hit their limit. Trying to fix a complex issue yourself can often make things worse, leading to more expensive repairs down the line. It’s not about admitting defeat; it’s about being practical and saving yourself a headache (and a lot of money!).
Recognising Complex Issues
So, what counts as ‘complex’? It’s not just a single scratch or a squeaky board. Think about these situations:
- Widespread Water Damage: If your floor has been soaked for a while, the subfloor might be compromised, or mold could be growing. This needs professional assessment.
- Structural Problems: Are your floorboards sagging? Is the subfloor uneven? These aren’t cosmetic fixes; they point to bigger structural issues that need a pro’s eye.
- Extensive Rot or Insect Damage: If you see signs of wood rot or pests like termites or woodworm, you need someone who can identify the extent of the damage and treat it properly.
- Matching Old Wood: Trying to repair a floor that’s decades old? Finding wood that matches the age, species, and finish can be really tricky. Experts have access to resources and knowledge for this.
Sometimes, what looks like a simple fix can hide deeper problems. A professional can spot these hidden issues before they become major headaches.
Finding Qualified Professionals
Okay, you’ve decided to call in help. Now what? You want someone who actually knows their stuff, especially when it comes to standards like BS 8201:2011. Here’s how to find them:
- Ask for Recommendations: Talk to friends, family, or neighbors who’ve had wood floor repairs done. Word-of-mouth is often the best way to find reliable people.
- Check for Certifications and Affiliations: Look for professionals who are part of trade associations or have certifications related to wood flooring or restoration. This shows they’re serious about their craft.
- Get Multiple Quotes: Don’t just go with the first person you call. Get at least three detailed quotes. Compare not just the price, but also what’s included and the timeline.
- Look for BS 8201:2011 Experience: Specifically ask if they are familiar with and work according to BS 8201:2011 guidelines. This is your best bet for a repair that’s done right and lasts.
The Value of Certified Work
When you hire someone who understands and follows standards like BS 8201:2011, you’re not just paying for labor. You’re paying for:
- Quality Materials: They know which woods, adhesives, and finishes are appropriate and durable.
- Correct Techniques: They use the right methods for installation, sanding, and finishing, which affects how your floor looks and performs.
- Longevity: A repair done to standard is much more likely to last, saving you money in the long run.
- Warranty: Many certified professionals offer warranties on their work, giving you extra peace of mind. It’s a sign they stand behind their repairs.
Common Pitfalls in Wood Floor Repair
DIY Disasters
So, you’ve watched a few videos online and think you’re ready to tackle that scratched or warped wood floor yourself? We’ve all been there, thinking, ‘How hard can it be?’ Well, sometimes, it’s a lot harder than it looks. Jumping into a DIY wood floor repair without the right knowledge or tools can often lead to more problems than you started with. You might end up with uneven finishes, mismatched wood, or even damage the subfloor. It’s easy to underestimate the precision needed for a good repair.
Cutting Corners on Quality
Another big mistake people make is trying to save a buck by using cheaper materials or skipping steps. Maybe you think a slightly different shade of wood won’t be noticeable, or that a quick-drying adhesive will do the trick. But here’s the thing: wood floors are an investment. Using subpar materials or rushing the process can mean your repair doesn’t last. You might see issues pop up again sooner than you’d like, costing you more in the long run.
Ignoring the Standards
This is where BS 8201:2011 comes into play. If you’re not following guidelines like these, you’re basically flying blind. These standards aren’t just bureaucratic red tape; they’re built on years of experience and testing to make sure repairs are done right. Ignoring them means you might be missing out on:
- Proper wood selection for your existing floor.
- The correct adhesives and finishes.
- Techniques that guarantee a durable, long-lasting result.
When you skip the standards, you’re not just risking a bad-looking floor; you’re risking its structural integrity and how long it will actually last. It’s like building a house without a blueprint – eventually, something’s going to go wrong.
Think about it: using the wrong type of wood filler can shrink or crack, and using the wrong finish can lead to discoloration or peeling. These aren’t small issues; they can ruin the whole look and feel of your room.
The Long-Term Benefits of Compliance
Protecting Your Investment
Look, your wood floor is a big part of your home, right? It’s not just something you walk on; it adds character and warmth. When you repair it according to BS 8201:2011, you’re basically giving it a new lease on life. This standard isn’t just some bureaucratic hoop to jump through; it’s a guide to doing the job right. Proper repairs mean your floor will last way longer. Think about it – using the right materials and techniques means less chance of it warping, cracking, or looking worn out again in a year or two. It’s like getting a really good tune-up for your car; it runs better and lasts longer. You’re not just fixing a problem; you’re investing in the future of your floor.
Maintaining Property Value
Nobody wants to buy a house with obvious problems, and a shoddy wood floor repair is a big red flag. Buyers notice these things, and they’ll definitely factor it into their offer. A floor that looks good and is known to be repaired correctly, following established standards, makes your home more attractive. It signals that you’ve taken good care of the place. It’s a simple equation: a well-maintained home, including its floors, generally fetches a better price. So, sticking to BS 8201:2011 isn’t just about the floor itself; it’s about the overall value of your property.
Peace of Mind
Honestly, knowing that your wood floor repair was done the right way, according to a recognised standard, just feels good. You don’t have to worry about it falling apart or looking terrible down the line. It’s that feeling of knowing you made a good decision and didn’t cut corners. This peace of mind is pretty priceless, especially when you’re dealing with something as visible and important as your flooring. It means one less thing to stress about in your busy life.
When you follow BS 8201:2011 for wood floor repairs, you’re not just fixing a surface; you’re building confidence in your home’s structure and appearance. It’s about doing it once and doing it right, so you can stop thinking about the floor and start enjoying your home.
Following the rules isn’t just about avoiding trouble; it sets your business up for success down the road. When you stick to the guidelines, you build trust with your customers and make your company stronger. This can lead to more opportunities and a smoother operation overall. Ready to see how we can help your business thrive? Visit our website today to learn more!
So, What’s the Takeaway?
Look, dealing with wood floor repairs can feel like a headache, right? But remembering BS 8201:2011 isn’t just about following some stuffy rulebook. It’s about making sure your floor doesn’t just look good for a week, but stays that way. Getting it right the first time saves you hassle and money down the road. So, whether you’re DIYing it or hiring someone, keep that standard in mind. It’s the difference between a quick fix and a job done right, so your floor can look great for years to come. Pretty simple when you break it down.
Frequently Asked Questions
What exactly is BS 8201:2011?
Think of BS 8201:2011 as a set of guidelines, like a recipe, for making sure wood floors are put in and fixed up the right way. It’s a British Standard, basically a rulebook created by experts to help people do a good job with wood flooring, especially when it needs fixing.
Why should I care about this standard for my wood floor repair?
Well, if your floor is repaired following these rules, it’s way more likely to last a long time and look great. It’s not just about making it pretty; it’s about making sure it’s strong, won’t cause problems later, and you don’t have to fix it again too soon. It’s like building something solid versus something flimsy.
Does BS 8201:2011 tell me what kind of wood to use for repairs?
Yep, it gives advice on picking the right materials. This means choosing wood that matches what you already have in terms of type, thickness, and how it’s been treated. Using the wrong stuff can lead to all sorts of issues down the road, like warping or unevenness.
What if I try to fix my floor myself?
DIY can be tempting, but it’s easy to mess things up if you don’t know what you’re doing. You might use the wrong glue, cut the wood incorrectly, or not prep the surface properly. Following the standard helps avoid these common mistakes that can end up costing you more in the long run.
How do I know if my floor repair needs a pro?
If the damage is pretty bad, like big cracks, water damage, or the floor is really uneven, it’s probably time to call in someone who really knows their stuff. These experts understand standards like BS 8201:2011 and have the tools and skills to fix it right the first time.
What are the real benefits of making sure my repair follows the rules?
It’s all about protecting your money and your home. A properly repaired floor adds value to your property, looks fantastic, and gives you peace of mind knowing it’s done correctly and will last. It’s an investment that pays off!


