So, your school gym floor is looking a bit rough? Those dark scuff marks can really make a place feel worn out. If you’re in Somerset and thinking about how to get your gym floor back in shape, especially with gym floor sanding somerset being a common need, you’ve come to the right spot. We’ll walk through what causes these marks and how to deal with them, including the sanding process itself. It’s not as hard as it might seem, but knowing the steps makes a big difference.
Key Takeaways
- Gym floor scuffs come from shoes and equipment rubbing on the finish.
- Keeping your gym floor looking good helps with school pride and safety.
- Before sanding, clear the area and protect anything nearby.
- Picking the right sandpaper grit is important for good gym floor sanding somerset results.
- Regular cleaning and maybe a new coat of finish will keep your floor looking nice longer.
Understanding Gym Floor Scuffs
What Causes Those Annoying Marks?
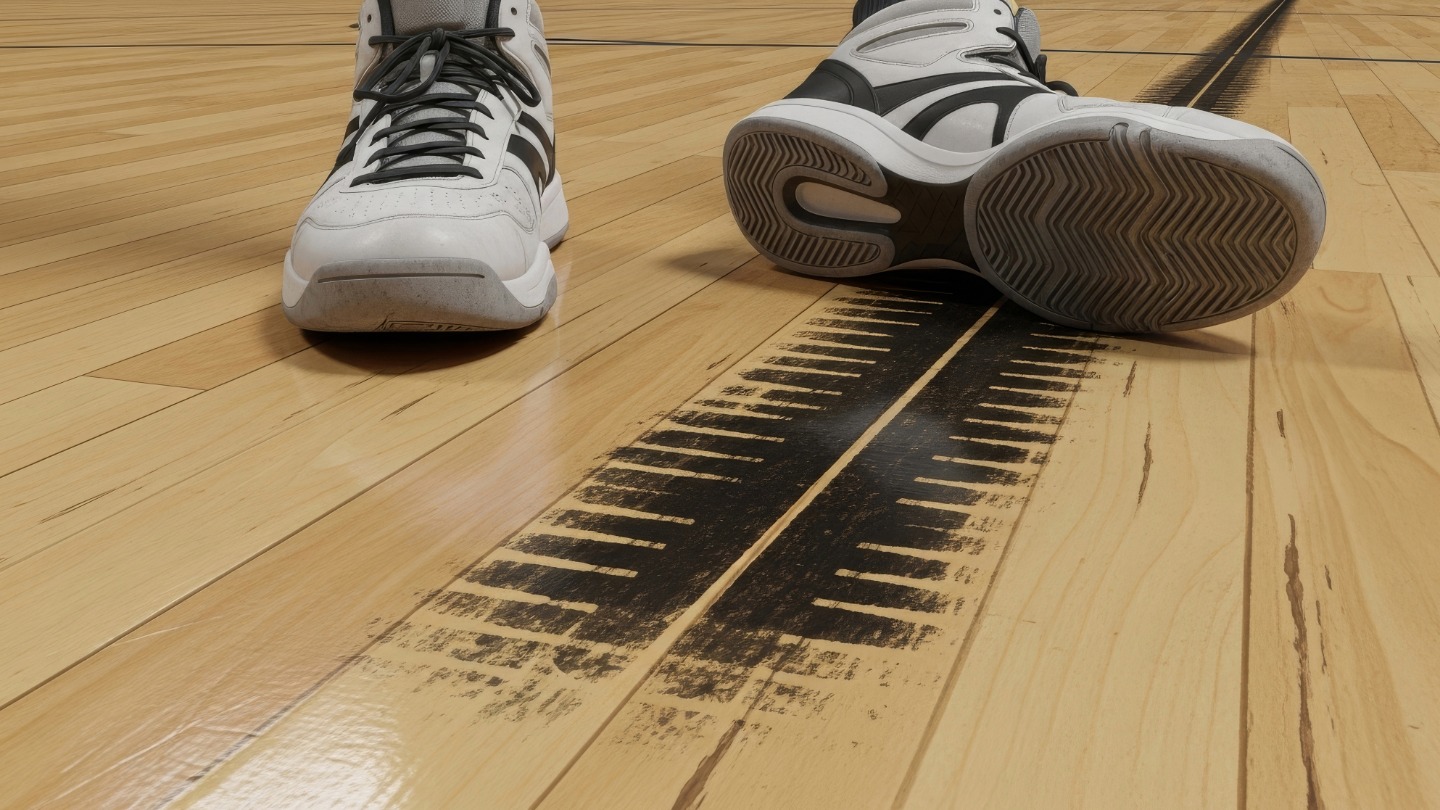
Ever wonder where those dark, stubborn scuff marks on your gym floor come from? It’s usually a combination of things, but the main culprits are the rubber soles of athletic shoes and the friction they create when players pivot, stop suddenly, or slide. Think about all the quick movements in basketball, volleyball, or even during a lively P.E. class. Each sharp turn or slide can leave a little bit of the shoe’s rubber behind on the floor’s finish. It’s not just the shoes, though. Sometimes, equipment being moved around, like benches or even portable bleachers, can drag and leave marks. Basically, any friction between a rubbery surface and your gym floor’s coating can lead to those unsightly scuffs. It’s a normal part of a well-used gym, but it definitely makes the place look a bit tired.
Why Scuffs Matter for Your Gym’s Look
Okay, so scuffs happen. But why should Somerset schools really care about them? Well, beyond just looking a bit messy, those scuffs can actually impact the overall impression of your school’s facilities. A gym floor that’s constantly covered in dark marks can make the whole space feel neglected, even if it’s cleaned regularly. It’s like wearing a nice outfit with a big stain on it – it just takes away from the whole picture. For a school, the gym is often a central hub for activities, sports, and events. A clean, well-maintained floor reflects positively on the school’s pride and attention to detail. It shows students, parents, and visitors that the school cares about its environment. Plus, letting scuffs build up can sometimes make them harder to remove later, potentially leading to more work down the line.
Getting Ready for the Sanding Process
Alright, so you’ve decided to tackle those scuffs and give your gym floor a fresh look with sanding. Before you even think about firing up that big sander, there are a couple of important things to sort out. It’s not just about the sanding itself; it’s about making sure the whole operation goes smoothly and safely.
Clearing the Court
First things first, you gotta get everything off the floor. This means all the sports equipment, mats, benches, scoreboards – you name it. Seriously, everything. Even small things can get caught in the sander or become projectiles, and nobody wants that. Think about it: a stray basketball rolling under the sander? Not good. You’ll want to move it all to a safe, out-of-the-way spot, maybe a storage room or a hallway that won’t be used for a bit.
- All portable sports gear (basketball hoops, volleyball nets, etc.)
- Team benches and seating
- Any mats or protective coverings
- Scoreboards and any wall-mounted equipment that might get in the way
Protecting Surrounding Areas
Now, sanding creates a lot of dust. Like, a surprising amount. You don’t want that fine wood dust getting into classrooms, offices, or the ventilation system. It’s super important to seal off the gym from the rest of the school. Use heavy-duty plastic sheeting and painter’s tape to cover doorways, vents, and any other openings. Pay extra attention to the gym doors – you might need to tape them shut from the outside too. This step might seem like a pain, but trust me, it’ll save you a massive cleanup job later.
Think of it like prepping for painting. You wouldn’t just start spraying paint everywhere without covering your furniture, right? This is kind of the same idea, just with wood dust instead of paint splatters. A little effort now saves a whole lot of headaches down the road.
The Art of Gym Floor Sanding Somerset
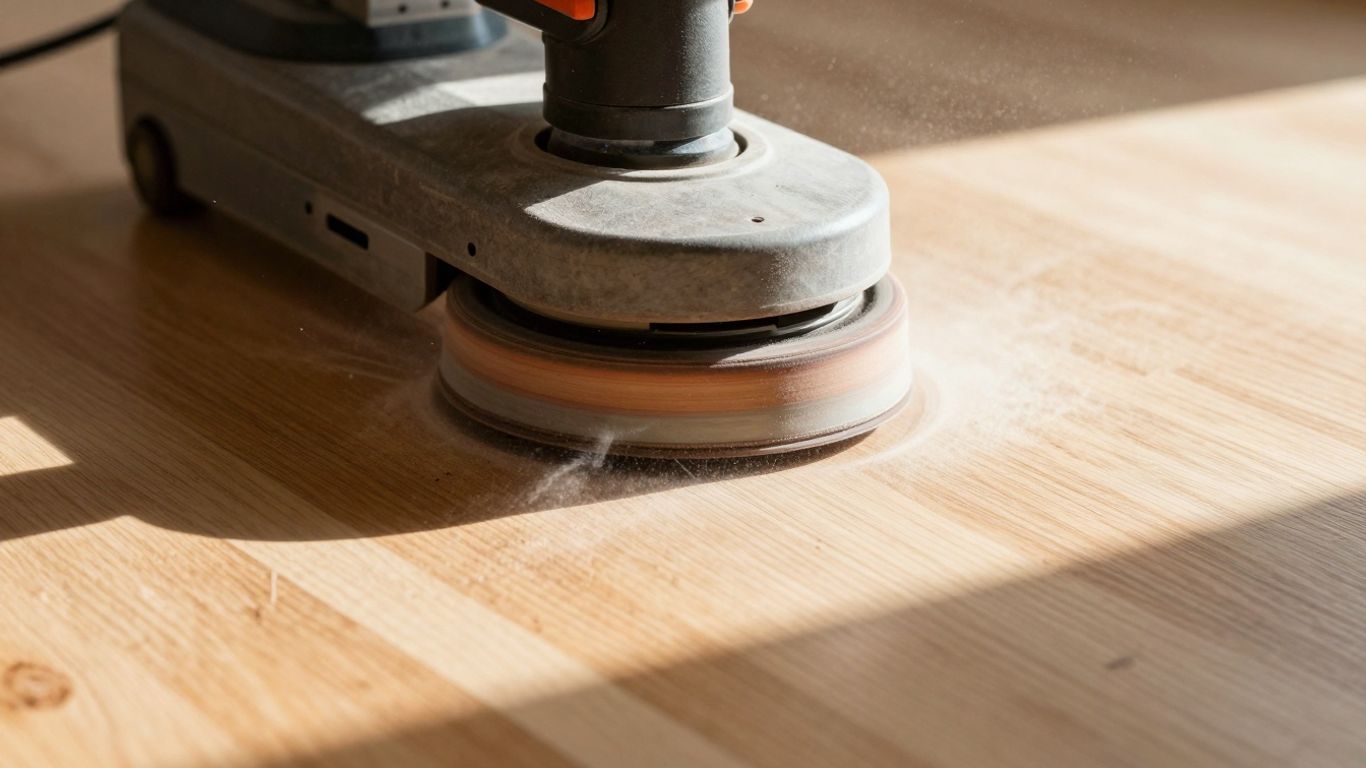
Alright, so you’ve prepped the court, and now it’s time for the main event: sanding. This isn’t just about roughing things up; it’s a careful process to get that floor looking its best again. Getting the grit right is super important here.
Choosing the Right Grit for the Job
Think of sandpaper grits like steps. You start with a coarser grit to take off the old finish and any really stubborn marks, and then you move to finer grits to smooth everything out. Skipping steps or using the wrong grit can lead to a bumpy or uneven finish, and nobody wants that.
Here’s a general idea of what you might use:
- 36-40 Grit: This is your heavy-hitter. Use it for the initial pass to remove old finishes, deep scratches, and those really tough scuffs. It’s aggressive, so be careful.
- 60-80 Grit: After the heavy lifting, you’ll switch to this. It smooths out the marks left by the coarser grit and starts to refine the surface.
- 100-120 Grit: This is your finishing touch. It makes the floor feel super smooth and prepares it for the new protective coating.
Sanding Techniques for a Smooth Finish
How you move the sander matters. You want to keep the machine moving at a steady pace and always sand with the grain of the wood. Going against the grain can leave little scratches that are a pain to get out later. Overlap your passes slightly so you don’t miss any spots. It’s a bit like mowing a lawn – you want even coverage.
Don’t rush this part. Take your time, make sure you’re covering every inch, and pay attention to how the floor is looking as you go. A little extra effort now saves a lot of headaches down the road.
Dealing with Deep Scuffs
Sometimes, a scuff mark is more than just surface-level. If you’ve got some really deep gouges or scuffs that the initial sanding doesn’t quite get rid of, you might need to do a little extra work. This could mean going back to a coarser grit just on that specific spot, or sometimes, if it’s really bad, you might need to consider wood filler. For most schools, though, a good sanding with the right grits will handle the majority of scuff issues.
Post-Sanding Care and Maintenance
Alright, so you’ve gone through the whole sanding process. Your gym floor is looking smooth, and those gnarly scuffs are history. But hold on, we’re not quite done yet. Keeping it looking good means a little bit of follow-up work. It’s like after you clean your car – you don’t just leave it there, right? You want to protect that shine.
Cleaning Up the Dust
First things first, you’ve got to get rid of all that fine dust from the sanding. Seriously, it gets everywhere. You’ll want to use a good shop vac with a HEPA filter if you have one. Go over the entire floor, paying attention to corners and edges. Then, a good damp mop (not soaking wet, just damp!) will pick up the rest. Let it dry completely before you do anything else. This dust is sneaky and can mess up your new finish if you don’t get it all.
Applying Protective Finishes
Now for the good stuff – the finish! This is what’s going to protect your floor from future scuffs and wear. There are a few types out there, like polyurethane or water-based finishes. Your choice might depend on how much traffic the gym gets and what kind of look you’re going for. You’ll usually apply this in thin, even coats. Most finishes need a few coats, with drying time in between. Always follow the manufacturer’s instructions to the letter. Skipping steps here is a recipe for a floor that won’t last.
Here’s a quick rundown of what to expect with finishes:
- Application: Usually done with a roller or a special applicator. Work in long, straight lines.
- Drying Time: Can range from a few hours to a full day between coats. Don’t rush it!
- Curing Time: This is when the finish gets really hard. It can take several days, sometimes even a week or two, before the floor can handle heavy use.
Remember, the finish is your floor’s shield. A good application means fewer headaches down the road. It’s worth taking your time and doing it right.
Keeping Your Floor Looking Fresh
Once the finish is all cured, you’ve got to keep up with it. Regular sweeping or dust mopping is your best friend. This stops dirt and grit from scratching the surface. For actual cleaning, use a pH-neutral cleaner specifically made for gym floors. Avoid harsh chemicals or too much water – they can damage the finish over time. Spot clean spills right away. And, of course, try to limit dragging heavy equipment across the floor whenever possible. A little bit of regular care goes a long way in keeping that gym floor looking sharp for years to come.
When to Call the Pros for Sanding
Recognising When DIY Isn’t Enough
Look, we all love a good DIY project, right? It feels great to tackle something yourself and save a few bucks. But when it comes to gym floors, especially those tough scuffs, sometimes you just gotta know when to throw in the towel and call in the cavalry. If you’ve tried a few things and those marks are still staring you down, it might be time to admit defeat and get some help. Seriously, some jobs are just bigger than they look.
Finding Local Somerset Sanding Experts
So, you’ve decided the pros are the way to go. Smart move! Now, where do you find them? For us here in Somerset, it’s all about looking for folks who specialise in wood floor refinishing, particularly for sports courts. You don’t want just anyone with a sander; you want someone who knows their way around a gym floor. Ask around at other schools, check local business directories, or even do a quick online search for “gym floor sanding Somerset.” Get a few quotes and see who feels like the right fit. It’s worth the effort to find someone reliable who can get your floor looking sharp again.
Wondering if your floors need a professional touch? While some sanding jobs are manageable, others can be tricky. If you’re dealing with deep scratches, uneven surfaces, or just aren’t sure where to start, it’s often best to let the experts handle it. Don’t risk damaging your beautiful floors! Visit our website to learn more about our professional sanding services and get a free quote today.
So, What’s the Takeaway?
Alright, so we’ve gone over how to tackle those tough scuff marks on your school gym floors. It’s not always easy, and sometimes you might feel like you’re wrestling a bear, but with the right approach, those floors can look pretty darn good again. Remember, a little effort goes a long way in keeping the place looking sharp for the kids. Don’t be afraid to try out some of the methods we talked about. If all else fails, well, there’s always professional help, but give it a shot yourself first. You might surprise yourself with what you can do.
Frequently Asked Questions
What exactly are those dark marks on the gym floor?
Those pesky dark marks, often called scuffs, happen when rubber from sneakers rubs off onto the floor’s finish. Think of it like drawing with a rubber eraser – bits of the rubber stick to the surface. It’s super common in busy gyms where lots of running and quick turns happen.
Why should I even care about scuffs on the gym floor?
Beyond just looking yucky, deep scuffs can actually damage the floor’s protective coating. If that coating wears down, the wood underneath can get stained or damaged more easily. Plus, a clean, shiny floor just makes the whole space feel way better for everyone using it!
How do I get ready to sand the gym floor?
First things first, you’ve gotta clear everything off the court! Move all the sports equipment, mats, and anything else that’s hanging around. Then, you need to cover up anything you *don’t* want dust on, like bleachers, scoreboards, or doors. Trust me, sanding makes a ton of dust!
What’s the deal with different sandpaper grits?
Think of grit like the size of the sandpaper’s ‘teeth.’ A lower grit number (like 36 or 60) has bigger, rougher teeth and is for taking off a lot of material, like deep scuffs. A higher grit number (like 100 or 120) has finer teeth and is for smoothing things out after the rough sanding. You usually start coarse and get finer.
How often should a gym floor be sanded?
It really depends on how much the floor is used and how well it’s maintained. For a busy school gym, sanding might be needed every few years to keep it in good shape. If you’re just dealing with light scuffs, you might be able to get away with cleaning and recoating for longer.
When is it better to hire someone to sand the floor?
If the scuffs are super deep, or if the floor has lots of damage like dents or scratches, it might be time to call in the pros. Also, if you’ve never sanded a big floor before, it can be a huge job. Professional floor sanders have the right tools and know-how to get it done right without messing things up.


