So, building a new home or doing a big renovation soon? You might have heard about new rules for soundproofing coming in 2026. It’s not just about keeping noise out; it’s about making spaces feel more peaceful. For those putting in wood floors, there’s a simple step that can make a big difference: using acoustic sealant. We’re going to look at why this matters, what you need to know about the sealant itself, and how to get it right.
Key Takeaways
- New building rules in 2026 will put more focus on how sound travels between rooms and floors.
- Acoustic sealant for wood floors acts as a barrier, stopping noise from leaking through gaps.
- When picking a sealant, check if it’s made for wood, flexible, and easy to work with.
- Good prep of the subfloor and careful application of the acoustic sealant are needed for it to work well.
- Sealant is just one part; using the right underlayment and insulation also helps cut down noise.
Understanding The New Soundproofing Rules
So, the building codes are getting an update in 2026, and it’s a pretty big deal for anyone building or renovating, especially when it comes to sound. It feels like for ages, soundproofing was kind of an afterthought, right? You’d put down some carpet, maybe, and hope for the best. But now, there’s a real push to make homes quieter, and honestly, it’s about time.
Why Soundproofing Matters More Than Ever
Think about it. We’re spending more time at home than ever before, and with more people working remotely, the noise from upstairs or next door can be a real headache. It’s not just about annoying noises; it’s about creating spaces where people can actually relax, focus, and get some sleep without being constantly bothered by the outside world or other parts of the house. Better soundproofing means happier, more comfortable living. It’s a quality-of-life thing, plain and simple.
What The 2026 Standards Mean For You
Basically, the new rules are going to require a higher level of sound insulation between different living spaces. This applies to new builds and major renovations. They’re setting stricter limits on how much sound can travel from one unit to another, or even between rooms within the same home. This means builders and contractors will have to pay more attention to how sound travels through walls, floors, and ceilings. It’s not just about keeping sound out, but also keeping sound in where it belongs.
Here’s a quick rundown of what you might see:
- Increased STC Ratings: Expect requirements for higher Sound Transmission Class (STC) ratings for walls and floors separating units.
- Impact Noise Reduction: More focus on reducing impact noise (like footsteps) with better underlayment and floor constructions.
- Airborne Noise Control: Measures to block airborne sounds (like voices and music) will also be tightened.
The Role Of Acoustic Sealant For Wood Floors
This is where acoustic sealant comes into play, especially for wood floors. When you install a wood floor, there are always little gaps and cracks, right? Around pipes, along the edges where the floor meets the wall, or even between floorboards if they aren’t perfectly tight. Sound, especially airborne sound, loves to sneak through these tiny openings. Acoustic sealant is designed to fill these gaps and create a barrier that sound can’t easily pass through. It’s a pretty straightforward way to boost your soundproofing performance without a massive overhaul. It’s a key piece of the puzzle for meeting these new, tougher standards, particularly when you’re dealing with wood, which can sometimes be a bit more permeable to sound than other materials.
When you’re trying to meet new building standards, every little detail counts. Ignoring small gaps can seriously undermine your soundproofing efforts, no matter how good your other materials are. Acoustic sealant is one of those details that makes a big difference.
Choosing The Right Acoustic Sealant
Alright, so you’ve decided to tackle the soundproofing for your wood floors, and you’re looking at sealants. It can feel a bit overwhelming with all the options out there, right? But don’t sweat it. Picking the right stuff is actually pretty straightforward once you know what to look for. The goal is to create a solid barrier that stops sound from sneaking through those tiny gaps.
Key Features To Look For
When you’re scanning the shelves or online listings, keep an eye out for these things:
- Flexibility: You want a sealant that stays a bit pliable even after it dries. Wood floors expand and contract with temperature changes, and a rigid sealant will just crack and lose its effectiveness. Think of it like a rubber band versus a dried-out piece of clay.
- Adhesion: It’s gotta stick well to both your subfloor and the wood planks. If it peels away, sound will find its way through. Look for products that specifically mention good grip on wood and common subfloor materials like plywood or concrete.
- Durability: Nobody wants to redo this job anytime soon. A good acoustic sealant should last for years without breaking down or losing its sound-dampening properties.
- Low VOCs: This is more for your health and the air quality in your home, but many good acoustic sealants are formulated to have fewer volatile organic compounds. It’s a nice bonus.
Sealant Types For Wood Floors
Most of the time, you’ll be dealing with a couple of main types:
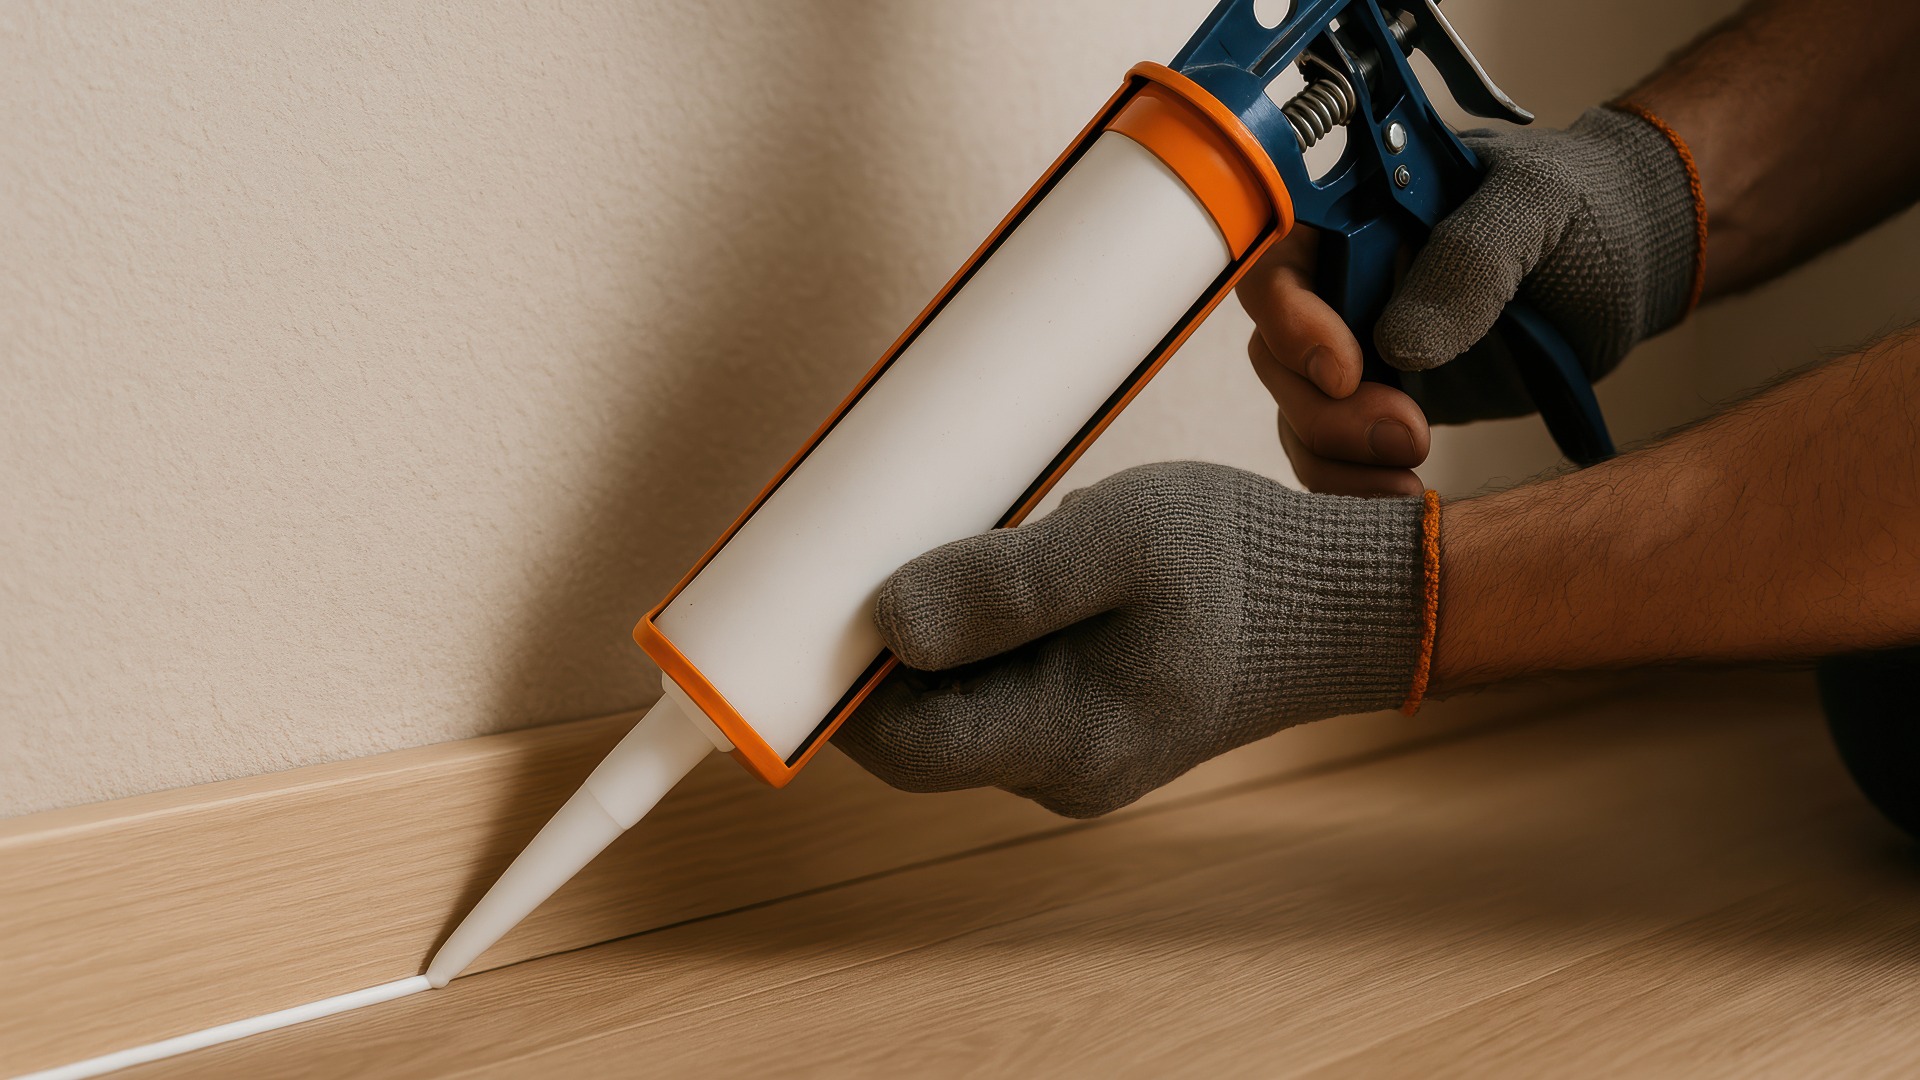
- Acoustic Caulk/Sealant: This is your go-to. It’s designed specifically for soundproofing and usually comes in a tube for a caulk gun. It’s flexible and sticky, perfect for filling gaps around the perimeter of the room, where the floor meets the walls, and any other openings.
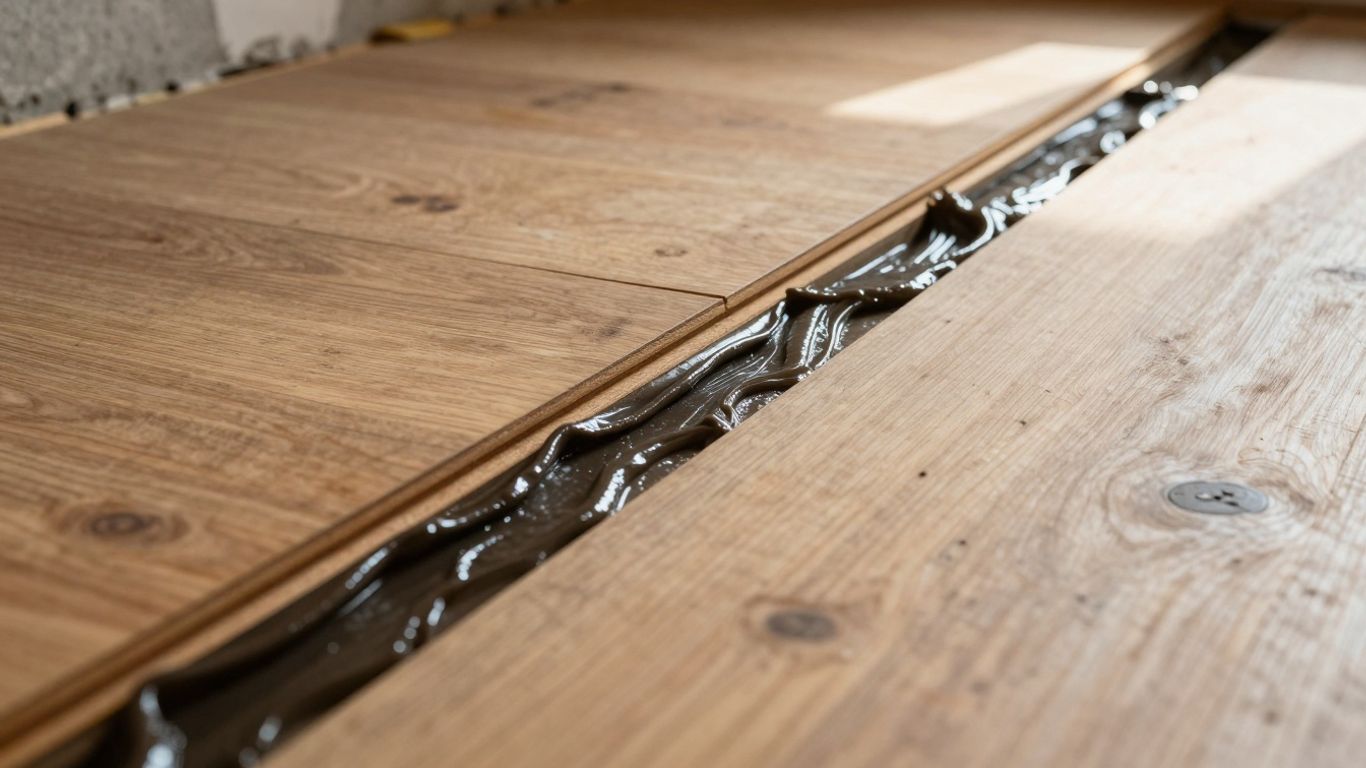
- Acoustic Mastic: This is a thicker, more heavy-duty adhesive. It’s often used under the wood flooring, like between the subfloor and an underlayment, or directly under engineered wood planks. It provides a strong bond and adds a layer of damping.
For sealing gaps after the floor is down, like around pipes or electrical boxes, acoustic caulk is usually the way to go. If you’re installing new wood flooring and want maximum sound control, you might consider using mastic as well.
DIY vs. Professional Application
So, can you do this yourself? Absolutely! Applying acoustic sealant is generally a pretty manageable DIY task. You’ll need a caulk gun, maybe a utility knife to open the tube, and a damp cloth for cleanup. The main thing is to be neat and thorough.
However, if you’re dealing with a really large area, or if you’re installing the flooring at the same time and want to be absolutely sure everything is done to spec, hiring a pro might be worth it. They have the experience to know exactly where and how much sealant to use, and they can often do it faster. Plus, they’ve got all the right tools.
When in doubt, check the product’s instructions. Some sealants have specific drying times or application temperatures that are important to follow. Don’t just wing it; read the label!
Ultimately, the best sealant for you depends on your specific situation – the type of wood floor, the subfloor, and the gaps you need to fill. But by focusing on flexibility, adhesion, and durability, you’ll be well on your way to a quieter home.
Proper Application Techniques
Alright, so you’ve got your acoustic sealant, and you’re ready to get this soundproofing party started. But hold up a sec – just slathering it on won’t cut it. How you apply this stuff is a pretty big deal for how well it actually works. Let’s break down how to do it right.
Preparing Your Subfloor
First things first, you gotta get that surface ready. Think of it like prepping a canvas before you paint. If your subfloor is dusty, dirty, or has old gunk on it, the sealant won’t stick like it should. You want a clean, dry surface. Sweep it, vacuum it, maybe even give it a light wipe-down if there’s any grease or residue. Seriously, don’t skip this step; it’s the foundation for good soundproofing.
Applying The Sealant Effectively
Now for the fun part. You’ll usually use a caulk gun for this. Cut the tip of the sealant tube at a slight angle – this gives you a nice bead. Start by applying a continuous bead of sealant along the edges where your wood flooring meets the walls. Don’t be shy, but don’t go overboard either. You want a good, solid seal, but you don’t want it oozing out everywhere.
Here’s a quick rundown:
- Edges: Seal all around the perimeter of the room where the floor meets the walls.
- Obstructions: Don’t forget around pipes, vents, or any other places where the floor meets something solid.
- Seams: If you have any gaps in your subfloor or between floorboards that are too big for the sealant to bridge, you might need to address those too. The goal is to close off any potential sound leaks.
Common Mistakes To Avoid
People mess this up more often than you’d think. Here are a few things to watch out for:
- Not sealing gaps: Leaving even small holes or cracks means sound can still sneak through. It’s like having a tiny hole in a balloon – it’s still going to lose air.
- Using the wrong sealant: Make sure it’s actually acoustic sealant. Regular caulk might not have the flexibility or sound-dampening properties you need.
- Applying too thin: A skimpy bead won’t do much. You need enough to create a proper barrier.
- Not letting it cure: Give the sealant time to dry and set up properly before you walk on it or install the flooring over it. Check the product instructions for cure times.
Think of acoustic sealant as the grout between your tiles. It’s not the main event, but without it, the whole thing falls apart. It’s all about closing those tiny pathways that sound loves to travel through.
Beyond The Sealant: A Holistic Approach
So, we’ve talked a lot about acoustic sealant for your wood floors, and yeah, it’s a big deal, especially with these new 2026 rules. But here’s the thing: that sealant is just one piece of the puzzle. You can’t just slap some goo in the gaps and expect magic. To really get your floors up to snuff for soundproofing, you gotta think about the whole system. It’s like building a good sandwich – you need the right bread, the right fillings, and yeah, maybe a little sauce to hold it all together.
Underlayment Options For Wood Floors
Think of underlayment as the foundation for your soundproofing efforts. It sits right between your subfloor and your new wood flooring. Different types do different things. Some are mainly for cushioning and moisture barriers, while others are specifically designed to soak up sound. You’ll see foam, felt, and rubber options. For soundproofing, you’re usually looking at thicker, denser materials. They help dampen vibrations before they even get a chance to travel through your floor.
- Cork: Natural, good for impact sound, and eco-friendly.
- Felt: Decent sound absorption, often a budget-friendly choice.
- Rubber: Great for impact noise, durable, and can handle a bit of moisture.
- Foam: Lightweight, good for basic sound dampening, but not always the best for heavy-duty soundproofing.
Insulation’s Impact On Sound
Don’t forget about what’s under your subfloor, especially if you have a basement or crawl space. Adding insulation in those areas can make a surprising difference. It’s not just about keeping your house warm; insulation also acts as a sound buffer. It catches and absorbs sound waves, stopping them from bouncing around and traveling upwards. Think of it like putting up egg cartons in a recording studio – it breaks up the sound.
Adding insulation to your ceiling joists (if you have a basement or crawl space below) can really help block sound from traveling up. It’s a step many people overlook when focusing just on the floor itself.
Integrating Acoustic Sealant For Wood Floors
Now, how does the sealant fit into all this? It’s the detail work. Once you’ve got your underlayment down and maybe some insulation sorted, the sealant comes in to seal up all those little cracks and gaps. These tiny openings are like highways for sound. They let noise sneak through where you least expect it. So, you’ll use your acoustic sealant around:
- The perimeter of the room, where the floor meets the walls.
- Around any pipes or wires that go through the floor.
- Any seams in the subfloor that might be letting air (and sound) through.
The goal is to create a continuous barrier. When you combine a good underlayment, maybe some extra insulation, and properly applied acoustic sealant, you’re building a much more effective soundproofing system than any single element could achieve on its own. It’s all about working together to keep the noise where you want it – or rather, where you don’t want it!
Maintaining Your Soundproofed Floors
So, you’ve gone through the trouble of getting your wood floors all sealed up for better soundproofing, which is awesome. Now, the big question is, how do you keep it that way? It’s not like you have to baby it, but a little bit of care goes a long way. The goal is to keep that acoustic sealant doing its job for years to come.
Long-Term Performance Of Sealants
Think of acoustic sealant like any other material exposed to daily life. It can wear down over time, especially if it’s constantly being stressed. Things like heavy furniture being dragged around, or even just the natural expansion and contraction of wood with temperature changes, can put a strain on the sealant. Most good quality acoustic sealants are designed to be flexible, which helps them handle this movement. However, extreme conditions or rough treatment can shorten their lifespan. You’re generally looking at a good number of years, often a decade or more, before you might even think about touching it up, assuming it was applied right in the first place.
Tips For Preserving Sound Quality
Keeping your floors sounding good isn’t just about the sealant itself; it’s about how you treat the whole system. Here are a few pointers:
- Be mindful of heavy items. When moving furniture, try to lift it rather than drag it. If you have really heavy pieces, consider using felt pads or furniture coasters. This reduces direct pressure and friction on the floorboards and the sealant.
- Regular, gentle cleaning. Stick to sweeping or vacuuming with a soft brush attachment. Avoid harsh chemicals or steam cleaners, as these can sometimes degrade sealants or affect the wood itself.
- Watch out for moisture. While wood floors and moisture are generally not friends, excessive water can seep into gaps and potentially affect the sealant’s bond or the wood’s integrity over time. Clean up spills promptly.
- Consider rugs in high-traffic areas. A nice rug can add a layer of protection against wear and tear in spots where people walk the most. It also adds a bit more acoustic dampening, which is a nice bonus.
The key to long-term soundproofing performance is a combination of using quality materials initially and then treating your floors with a bit of respect. It’s not about being overly cautious, but about understanding how your floor system works and avoiding actions that could compromise the soundproofing you’ve invested in.
Keeping your soundproofed floors in good shape is pretty straightforward. Regular sweeping and occasional damp mopping will do the trick for most situations. Avoid harsh cleaners, as they can damage the finish. For deeper cleaning or to tackle tough spots, check out our specialised floor care products. Visit our website today to explore our full range of maintenance solutions and keep your floors looking their best!
So, What’s the Takeaway?
Alright, so we’ve talked a lot about making sure those wood floors are quiet. It’s not just about making your home sound nice, though. With the new building rules coming in 2026, getting the acoustic sealing right is going to be a big deal. It means less noise complaints and happier neighbors, which is always a win. Plus, doing it right from the start saves headaches down the road. So, when you’re planning your next project, don’t forget about the sound. It really does make a difference.
Frequently Asked Questions
Why are there new sound rules for wood floors in 2026?
Basically, people want quieter homes! New building rules are coming in 2026 to make sure new houses and apartments are better at blocking noise between rooms and from outside. This means less stomping heard from upstairs and fewer street sounds bothering you.
What exactly does ‘acoustic sealant’ do for my wood floors?
Think of acoustic sealant as a special caulk. It fills up tiny gaps and cracks around the edges of your wood floor and where it meets walls. This stops sound waves from sneaking through those openings, making your room sound more peaceful.
Can I just use regular caulk instead of acoustic sealant?
Nope, not a good idea. Regular caulk is made for sealing drafts, not sound. Acoustic sealant is designed to be flexible and absorb sound vibrations. Using the wrong stuff won’t really help with noise and might not last as long.
Is putting in acoustic sealant a hard job for a beginner?
It’s usually pretty straightforward, kind of like using a glue gun. You just need to make sure the area is clean and dry before you start. If you’re careful and follow the instructions, most people can handle it. But if you’re unsure, hiring someone is always an option.
Does acoustic sealant work alone, or do I need other things?
Sealant is a great part of the puzzle, but it works best with other sound-blocking materials. Things like special underlayment pads beneath your wood floor and insulation in the walls and ceiling really boost the soundproofing power. It’s all about working together!
How long does acoustic sealant last, and do I need to replace it?
Good quality acoustic sealant is built to last for many years, often as long as your floor is there! It stays flexible and doesn’t dry out and crack like regular caulk. So, once it’s in properly, you usually don’t have to worry about it for a very, very long time.


